Hand Ground Chicken Meatballs

IMG_3955

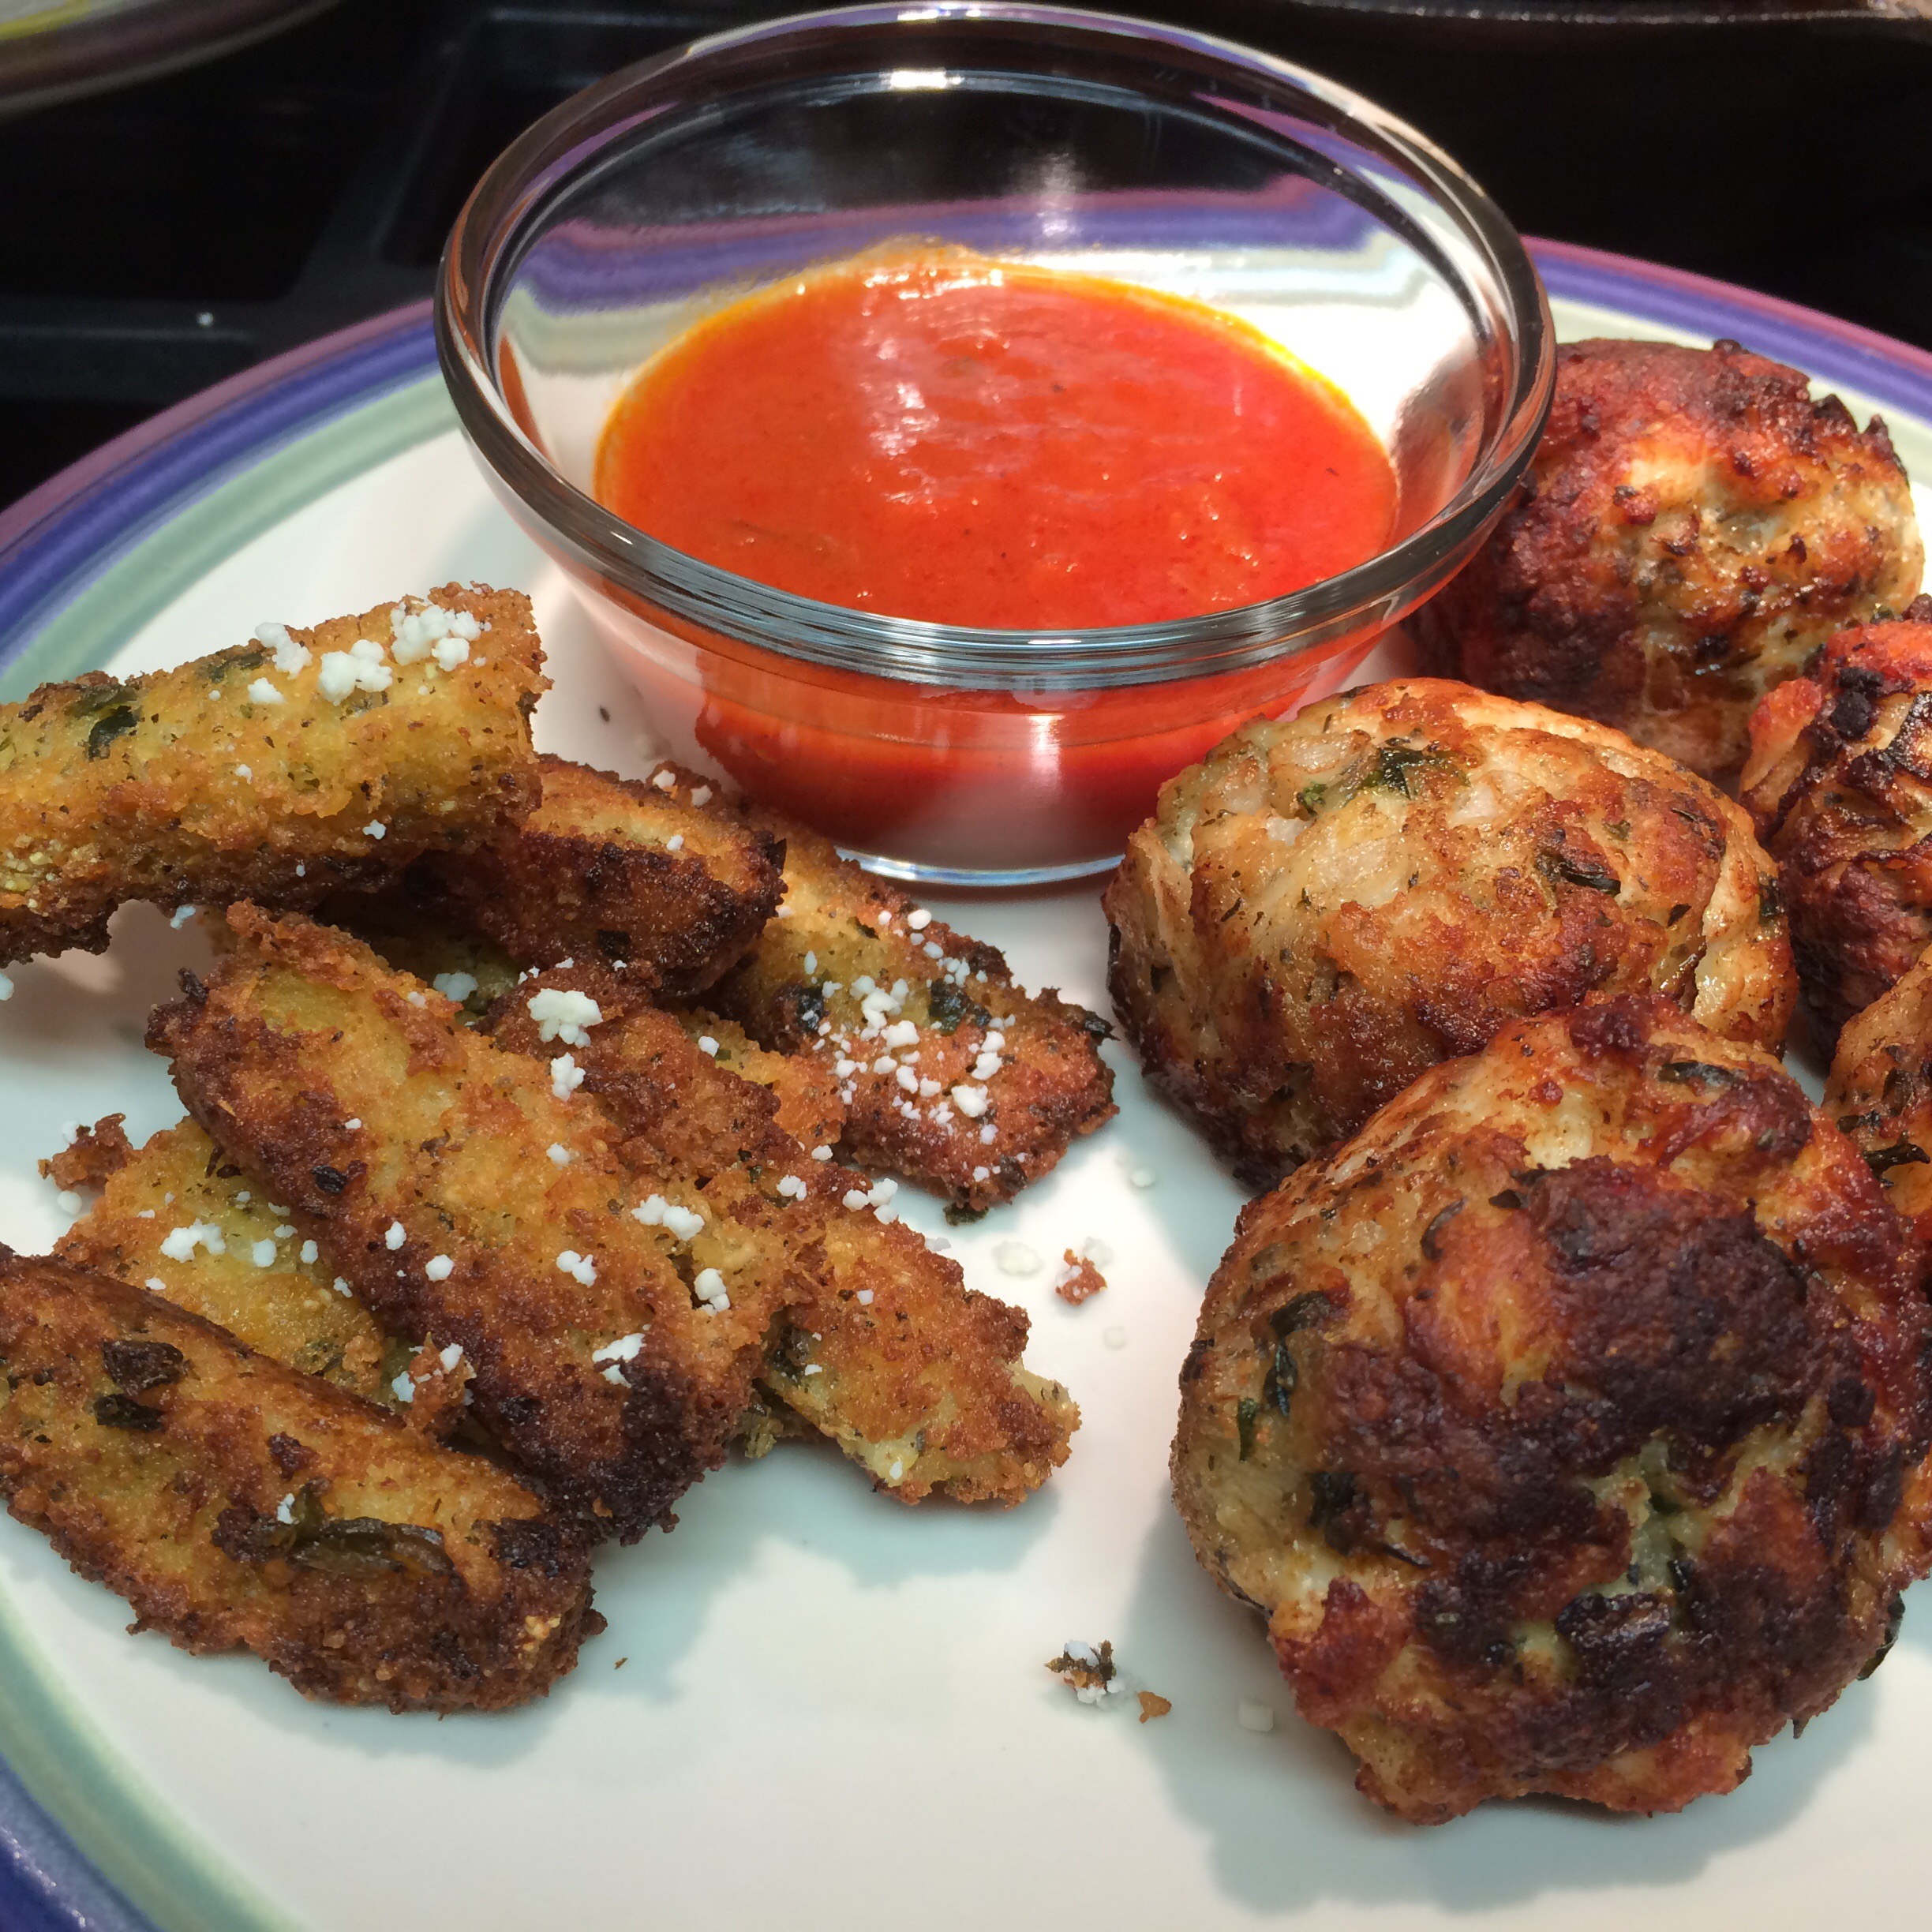
So I had taken some chicken breasts out of my freezer to thaw, but left one behind, figuring I would get to it later in the week. Later in the week came and I wasn’t in the mood to grill it or make a cutlet or so whatever it is people do with a single chicken breast. I was really in the mood for meatballs to go with my polenta fries.

I realized I do not own a grinder, and a food processor would probably destroy the meat’s texture. So I decided to see what I could do with a knife. As I started to chop, I remembered I have a meat mallet for pounding cutlets. I decided to use that on the breast, combined with chopping, and I was really pleased with the results. It was then time to put the meatballs together.

CHICKEN MEATBALLS
1 chicken breast (4 – 5 ounce piece)
1 egg
1/3 cup bread crumbs
1/4 cup parmesan cheese
1/2 onion, roughly chopped
2 tablespoons fresh parsley
1 tablespoon Italian seasoning
Dash of Worcestershire sauce
Dash of Hot Sauce (I used Sriracha)
Salt and Pepper

  1. “Grind” the breast by the method of your choice
  2. Mix all ingredients together, first stirred with a spoon, then knead by hand
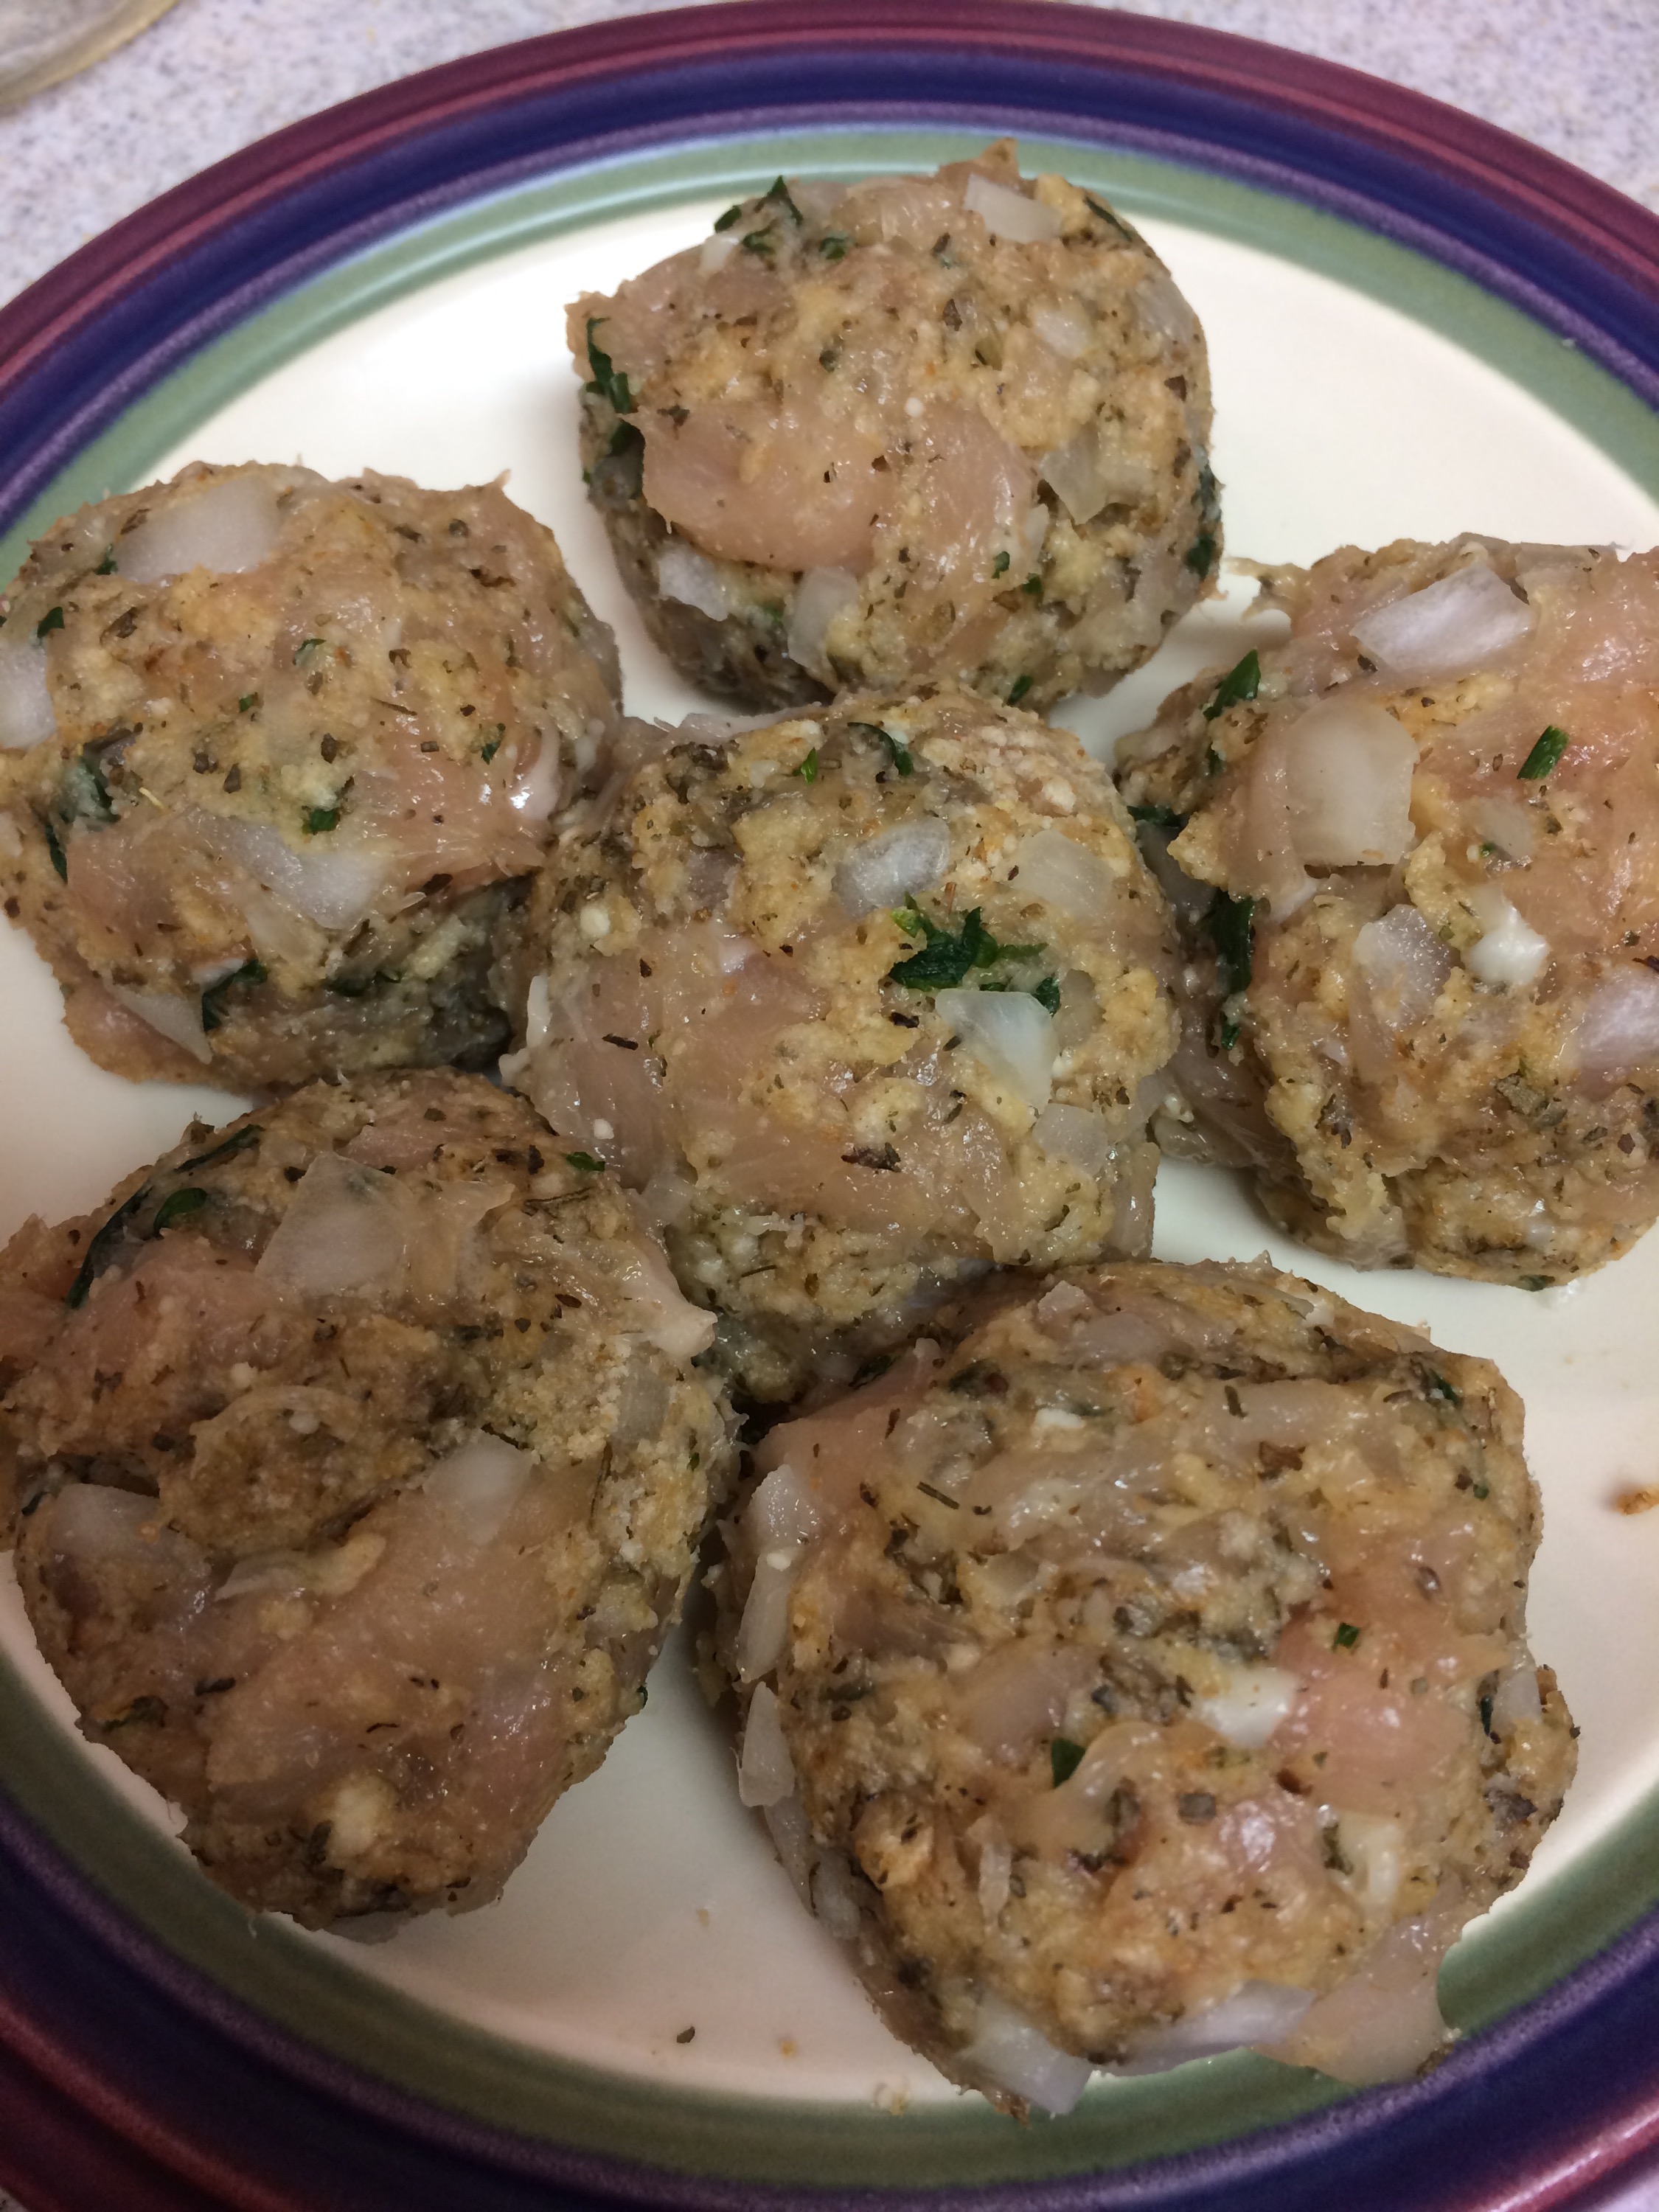
  3. Portion out the meatballs to the size of your choice, I used an ice cream scoop to make balls slightly larger than a golf ball
  4. Chill the meatballs for about half an hour to set
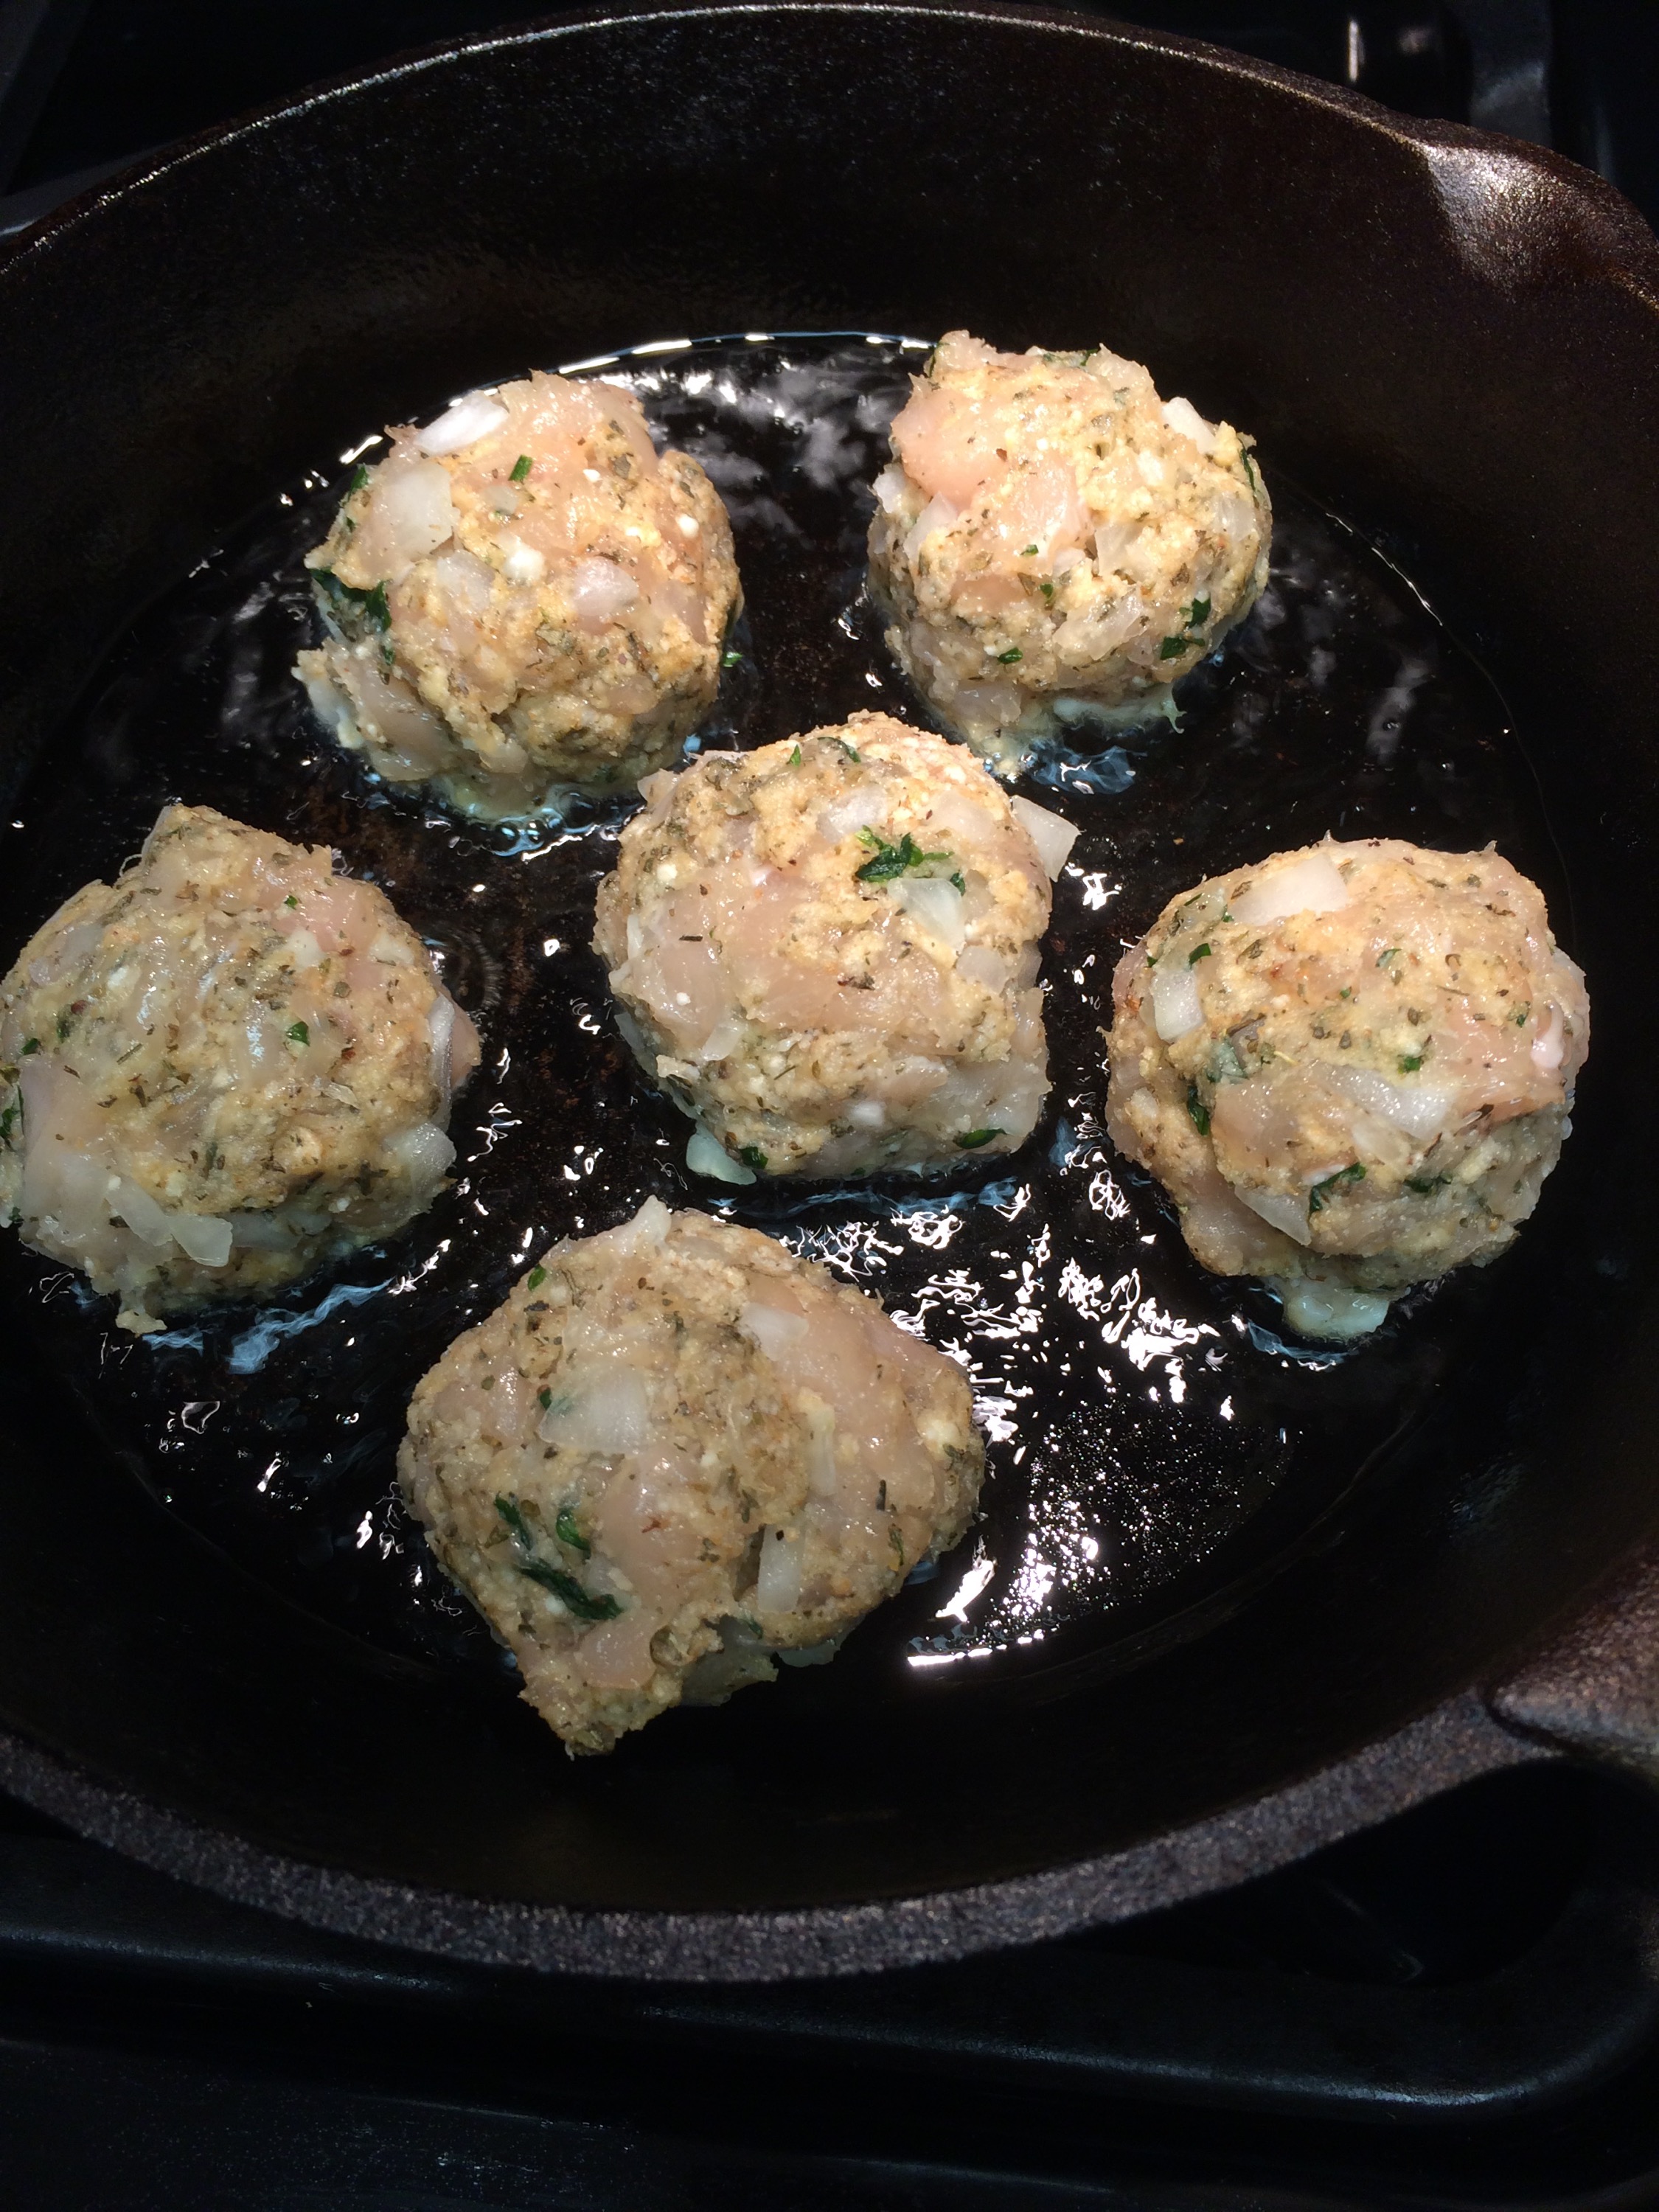
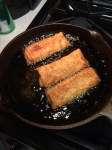
  5. When ready, pour oil in the vessel of your choice (I like cast iron), heat to about 350 degrees
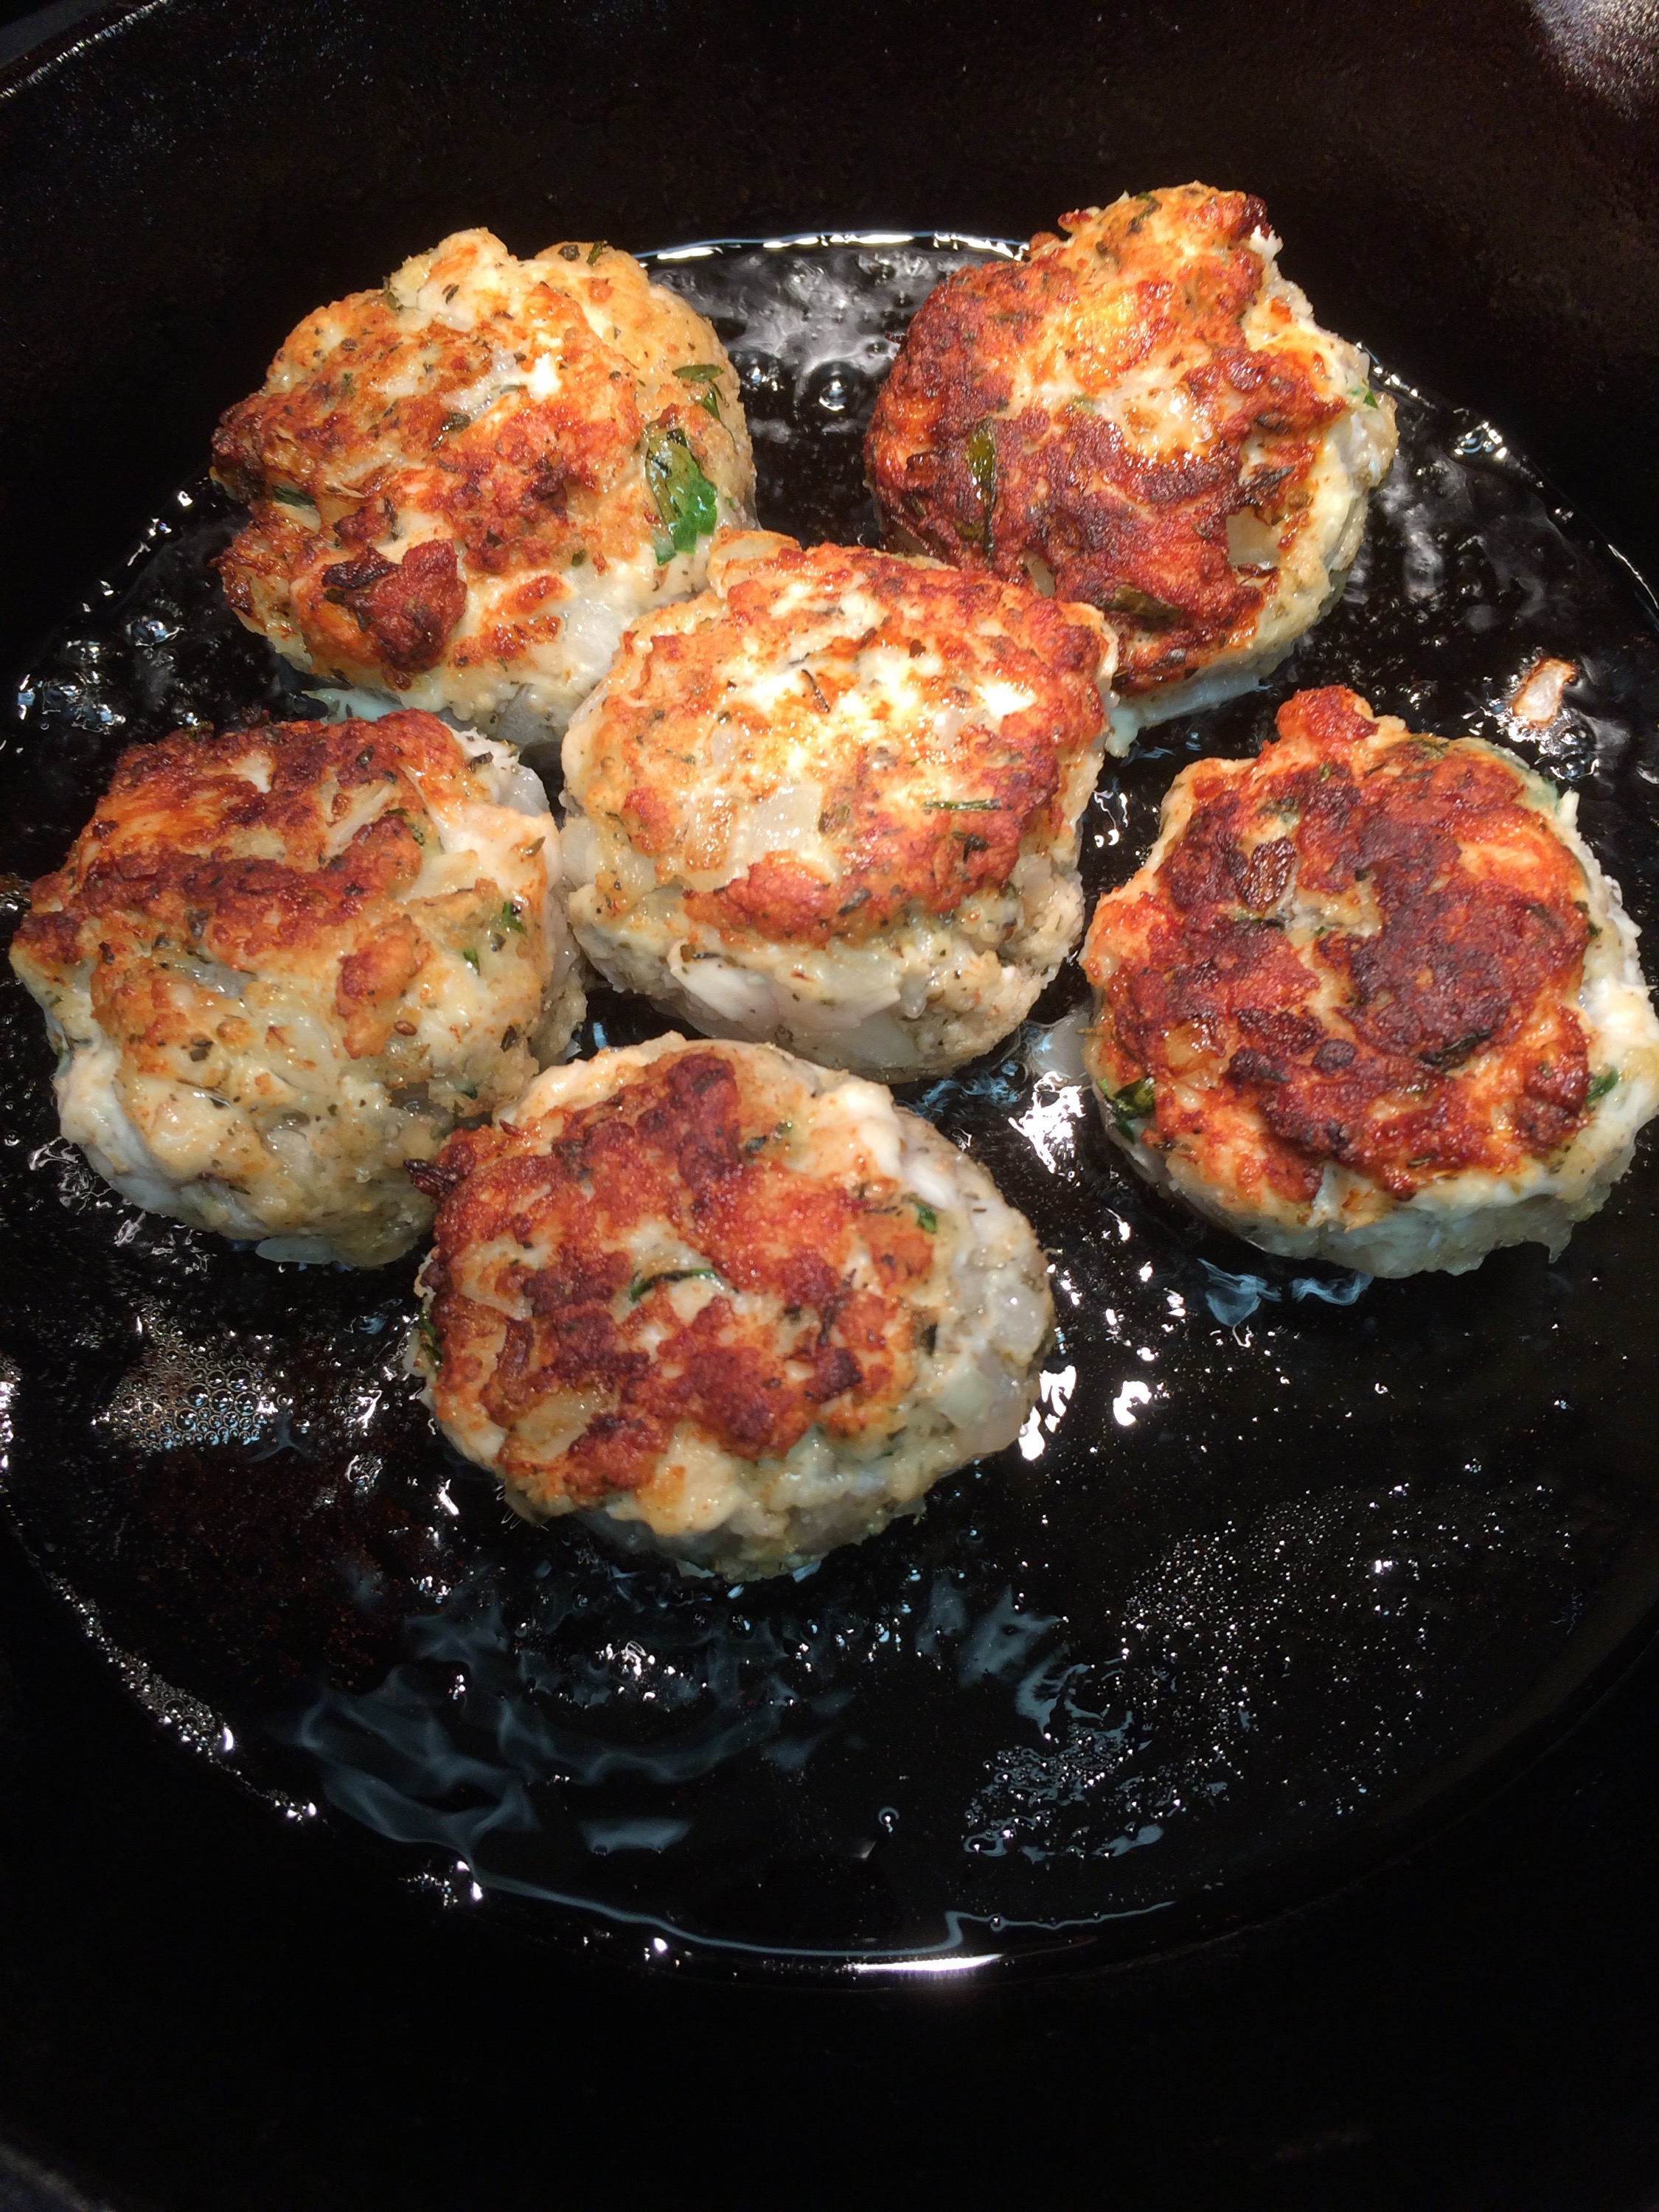
  6. Fry meatballs 2-3 minutes on each side. Depending on the size, you may want to finish in the oven to ensure they are thoroughly cooked
  7. Serve with marinara for dipping


Cake Mix Brownies…an experiment

  
I’m prepping for Sunday’s dinner party. Menu is set (don’t want to share it all as it’s a surprise for my guests), groceries have been purchased, and I decided to start on the dessert tonight. I want to make ice cream cake because not only is it summer, I probably haven’t made one in about 2 years. Looking back on my own recipe, I swore it was Oreo-bottomed, but turns out it is brownie-bottomed. 

Thinking I had all the ingredients for brownies, I sought out to make it, but alas, I’m out of sugar. Since I don’t feel like bugging any of my neighbors (I don’t really know them), I figured surely I have a mix somewhere in my pantry. I was stoked when I saw a box of No Pudge!, but alas, it was open as I was making a serving at a time.

I saw a box of chocolate cake mix and looked to see if there was a recipe for brownies. Alas, there was not. So I googled….I prefer chewy brownies so I did a search and settled on a recipe that sounded super easy – just an egg, some oil, and water.

I put the mix together and the texture was super thick and gooey – almost like peanut or almond butter. It also tasted a bit off, so I added a tinge more oil, some salt, and some vanilla extract.

  
I had some trouble spreading it in my springform pan. It is baking as I write this….wish me luck! 

Update – it came out looking right, but rose more than regular brownies. I hope it shrinks down a bit because I want a thinner base. Worst case, I’ll saw some off the top.


Greek Maroulosalata

chef's journal

One of my favorite salads is a simple Greek salad primarily comprised of Romaine lettuce, scallions, and dill. I love it so much more than the traditional Greek salad of cucumbers, tomatoes, and feta.

One of the keys to nailing this salad well is white wine vinegar with the dressing. The vinegar complements the flavors without overpowering, brightening the ingredients.

IMG_1523

It’s simple to prepare, just some cleaning and chopping. It’s a great summer salad, but can be enjoyed year round.

MAROUSALATA
Romaine Lettuce, chopped
Fresh Dill, chopped
Scallions, chopped
Olive Oil
White Wine Vinegar
Salt and Pepper
Feta Cheese, optional

Quantities for this salad is up to your personal preferences. I usually use about 1 head of lettuce, 1/2 cup of scallions, 1/4 cup dill, and a 2:1 ratio of oil to vinegar. I am not a huge dressing fan so I lightly dress the greens. Season with salt and pepper to taste, and topped with crumbled feta if so desired.

Strawberry Hand Pies

IMG_3955Speaking of summer, another one of my loves for the summer is berries – strawberries, blueberries, blackberries, raspberries, etc. They are so versatile and can be used in countless ways – salads, sauces, cocktails, crumbles, gallettes, etc.

One thing I like to make, which is a cousin to my empanada obsession, is hand pies. I find strawberries fall apart too much when you prepare them as a filling, making a really slopping and unattractive traditional pie. But for a hand pie, they are a great consistency.


I was at the grocery store yesterday and found a good deal on strawberries. I often freeze and reserve for smoothies, but I decided to go the sweet route. I also had some Dancing Deer Flaky Pie Crust mix, and as always, some butter in my freezer, so I was good to go.

Preparation is really easy, especially using a pie crust mix. You can go an extra step with laziness by using refrigerated pie crust or frozen puff pastry for turnovers. I do not suggest cheating on the strawberries – keep them fresh.

STRAWBERRY HAND PIES
Makes 8 Pies
1/2 package Dancing Deer Flaky Pie Crust Mix (7.2 ounces)
1 stick Butter, cold
2 ounces water

2 cups fresh Strawberries, cleaned and halved or quartered
1/4 cup Sugar or Maple Syrup
2 tablespoons Corn Starch, dissolved in 2 tablespoons water

Extra Butter or Coconut Oil

  1. Prepare pie crust according to package directions. Roll into a large, thick disc and cut into 8 equal pieces. Refrigerate until ready to prepare pies.
  2. In a heavy bottomed nonstick pan, add the strawberries and sugar. Boil until some of the liquid is reduced. Add the corn starch mixture and cook until well incorporated and mixture starts to thicken. Remove from heat and allow too cool. If filling is too hot, it will melt the butter in the pie crust and the crust will fall apart, or you will have soggy pies.
  3. When ready to assemble, preheat oven to 350 degrees.
  4. Roll dough out, one piece at a time, to about 1/4 inch thick. Add about 2 tablespoons of filling in the center and fold the hand pie over, sealing the edges by hand. Too much filling will spill out. Score the top of the pie to allow ventilation during baking.
  5. Line a cookie or baking sheet with parchment paper. Line the pies on the sheet, about 1 -2 inches apart. Baste the top of each pie with a bit of butter or coconut oil. Bake for 25 minutes or until crust starts to turn a light golden brown.
  6. Serve warm with ice cream, whippped cream, or all alone 🙂


Summer Corn Chowder

IMG_3955

My years of living in New England made me a chowda lover. In addition to the regional cuisine, I had a roommate who was obsessed with the dish, especially corn chowder.

Now that summer is here I am taking advantage of all the fresh beautiful produce out there. This afternoon I picked up corn, potatoes, and bacon for the soul purpose of transforming them to soup.


I also love any reason to use my Staub coquette.


The soup is really easy to prepare once all the chopping is complete.

SUMMER CORN CHOWDER
5 ears fresh Corn
3 Potatoes
1 sweet Onion
5 strips Bacon
1/4 cup Flour
1/2 stick Butter
2 Tablespoons Old Bay Seasoning
2 quarts Chicken Stock
1 cup Greek Yogurt
Salt and Pepper, to taste
Cheese and Scallions to garnish, optional

  1. Prep the corn, potatoes, and onions. Strip the corn from the cob, using either a knife or corn stripper. Dice the onion to a medium chop, and peel and cube the potatoes into one inch pieces.
  2. In a heavy bottom pan, render the bacon. Once browned, remove the strips, leaving the grease.
  3. Sauté the onions until soft and starting to brown. Add corn, flour, and butter. Cook, stirring constantly, about two more minutes until ingredients are well incorporated.
  4. Add chicken stock and potatoes. Bring soup to a boil, then reduce to a simmer. Simmer about 25 minutes until potatoes are fork tender.
  5. Ladel out about 2-3 cups of soup, process in a blender until smooth and creamy. Mix in to the rest of the soup.
  6. Chop the bacon and add to the soup. Adjust seasoning to taste preference. Serve with cheese, scallions, and fresh ground pepper, if desired.


Summer Lentil Salad

IMG_3955

I love lentils. I believe I have mentioned this numerous times. They are healthy, a great source of protein, and versatile.

This time of year as the weather gets warmer and I like to cook a bit less, I like batch cooking once or twice a week to have lunch for work or a quick meal to share. In comes Lentil Salad. You can put pretty much what you want and it will last about a week in the fridge.


Another great thing about it is that I don’t have a precise recipe. It’s really something I whip together. I think the only constant is lentils and a balsamic vinaigrette.

Here’s what I used in my salad:

  • Greek Lentils (cooked al dente and cooled)
  • Chicken Sauasage (sliced, browned in a pan with a little oil and cooled)
  • Scallions
  • Diced Cucumbers
  • Olive Oil
  • Balsamic Vinegar
  • Italian Seasoning
  • Salt and Pepper

Toss it all together and you have your meal! It can be served cool or room temperature. Feel free to experiment! Veggies, goat cheese, ham, other meats, different dressings…just have fun with it!

Have Potatoes, Will Focaccia

 
I have this tendency to buy potatoes and not use them before they get gross.

Even though we’ve been experiencing 80+ degree days here in New Jersey, I was feeling the urge to bake.

  
One of my go-tos that I don’t do often enough is focaccia. It’s a pretty easy pantry staple because all you really need is flour, oil, salt, sugar, and yeast. It’s a quick bread to make – about two hours to do, and about 90 minutes of that is just hanging out and waiting.

For a moister, fluffier center and chewy-crunch crust, potatoes are also used. My inspiration for this focaccia came from a Bon Appetit recipe from a few years ago. I modified it this time around, omitting the seasonings/toppings. I opted for a Rosemary-rich Italian seasoning blend and Parmesan cheese. 

Focaccia also makes a great Accidental Pantry Project Recipe – you do not need potatoes, but they do make a better bread. The rest is pretty much stuff you have around – flour, yeast packets, sugar or honey, oil, and water. 

Follow the rest of the recipe accordingly.

Homemade Coconut Oil Chocolate with Fleur de Sel


I have been on a huge coconut oil kick lately. I first learned about the benefits years ago when I was a writer for the eco-living site Ideal Bite. It is truly a superfood.

Lately I have been using it more as a supplement and in my cooking as it is supposed to be a metabolism booster. I use it to make popcorn, I’ve had it in coffee, and I like a little in my morning smoothies. It appears to be working because I find my jeans being looser without a drastic change in diet.

I came across this chocolate recipe on Pinterest and decided to give it a try, but I took it a step further with cacao nibs instead of organic cocoa powder. The main reason being while I had both nibs and powder at home, I had more nibs than I knew what to do with.

  
The goods – coconut oil, honey, cacao nibs, vanilla extract, and fleur de sel. 

 I pulverized about a cup of nibs in my food processor. The texture was still grainier than I wanted so I mixed in about 1/4 cup of honey.
  
The honey made the mixture much smoother and I hoped the heat from the oil and stove would help smooth it out.


I heated the oil until warm (I was scared the chocolate would fry) and whisked in the cacao and honey mixture. It was not incorporating as much as I wanted and it wasn’t sweet at all. I ended up using the full amount of sweetener the recipe suggested – 3/4 of a cup (I mixed maple syrup with the honey), and it helped it all come together like a sauce. I added in about a tablespoon of vanilla. I love vanilla and always use more than a recipe calls for. 

  
I was now ready to cool it. 

 
I lined a pan with plastic wrap and poured out the chocolate.

  I then let it set for a moment and sprinkled it with the fleur de sel.

   Chocolate is ready to cool and harden in the fridge!

 
Texture is slightly fudgier than I intended. Next time I will lesson the oil and increase the cacao. 

Not Cooking With As Much Innovation Lately

chef's journal

The past few weeks at work have been a blur and I found that I am not doing anything particularly exciting in the kitchen, which makes me a little sad because I committed to keeping up with my writing and cooking.

Some highlights of what I have done lately:

  • Breakfast smoothies – almost every morning for protein and vitamins – usually a mix of frozen fruit, almond milk, Greek yogurt, and some sort of berry juice. I bought my Vitamix just over a year ago and use it several times a week
  • Eggrolls – I have done baked steak eggrolls and fried pork eggrolls. I am enjoying frying in my cast iron skillet. An easy and quick dipping sauce is taking store bought duck sauce and thinning it with a bit of Sriracha. It effortlessly elevates the quality and complexity of the sauce
  • Baked Potato Soup – revisiting my old recipe using my new Staub coquette

More inspiration to come soon as I am going to visit London and Paris in less than a month!

Vegan Creamed Kale

IMG_3955

Months ago I tried a vegan version of creamed kale and it stayed with me – I really wanted to replicate the side dish. In usual fashion I bought too much kale recently and pondered what to do with it, so I decided to take a stab at it. I picked apart some recipes on Pinterest and came up with my own.

IMG_4300

The first thing you need is your cream sauce. I do not know why these ingredients combined together mean magic, but they just do:

VEGAN CREAM SAUCE

1/4 cup homemade cashew butter
1 cup unsweetened plain almond milk (I prefer almond breeze)
1/2 cup nutritional yeast flakes (I use red star)
Nutmeg, Salt and Pepper – to taste

In a medium sized saucepan, melt the cashew butter over a low flame – do not allow to scorch. Add almond milk and whisk mixture together until well incorporated and smooth. You can raise the heat to medium and add yeast flakes and seasonings – adjust to your liking. Personally, it needs a good amount of salt. Cool and set aside to use in recipes immediately, or you can refrigerate for up to one week – makes a great pasta sauce as well!

VEGAN CREAMED KALE

1/2 onion, chopped
1 clove garlic, crushed
1 tablespoon coconut oil
4 cups baby Kale
1/2 cup – 1 cup Vegan Cream Sauce

Over high heat, heat coconut oil in a large, heavy bottomed skillet. Add onions and lightly saute, until softened and slightly translucent. Add garlic and kale and mix with onion. Lower heat and cover skillet for about two minutes, allowing the kale to steam. You can steam longer if you prefer softer vegetables. Remove lid and add cream sauce, mix until all the kale is coated and hot, about one minute. Serve with your favorite vegan entree or just enjoy on its own!