Vegan Chocolate Caramel Truffles

Leave it to post-Easter to continue on the meat free and dairy free crusade. I was asked to do a coffee tasting for a work meeting and I cannot do a coffee tasting without epic treats. It’s just my MO.

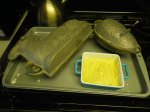
While I made Chocolate Chip Caramel Cheesecake Bars for the rest of the crew, one of my fellow managers is vegan, so I wanted to prepare a treat that he could eat as well. The coffee we were tasting, Starbucks Caffe Verona, goes great with chocolate and caramelized sugar. Most caramel recipes contain dairy, so I went on a hunt to find a caramel flavoring that was vegan. I could have just purchased Starbucks caramel syrup, but I was not thinking when I was at the grocery store. Instead, I found this product, Walden Farms Caramel Syrup. It was fat free, sugar free, calorie free, gluten free, etc….and more importantly for my purpose, dairy-free and vegan.

I wasn’t sure what to do with my caramel sauce, all I knew is that I had to come up with something vegan which included chocolate and caramel.

Racking my brains for a little while, it hit me. Modify an Oreo truffle recipe. Oreo truffles were a huge hit with my staff back at Christmas time, and they are super easy to make – oreos mixed with cream cheese and dipped in chocolate. At my disposal, I had vegan dark chocolate for melting, Nabisco Famous Wafer Cookies (which are essentially oreo cookies without the filling), and the caramel syrup. I decided to mix the cookies, sauce, and some margarine to create my truffle filling. The margarine and caramel sauce became my cream cheese substitute. Caramel was used for flavor and the margarine was used as a creamy fat which would solidify at room temperature.

So…here’s my on the fly recipe:

  • 20 Nabisco Famous Wafer Cookies
  • 1/4 cup Walden Farms Caramel Syrup
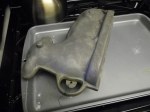
  • 1/4 cup Margarine, melted
  • 4 ounces Vegan Dark Chocolate (more or less may be needed), for dipping
  • 1 tablespoon Vegetable Shortening, for dipping mixture
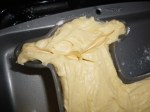
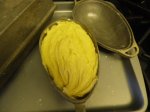
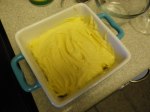
  1. In a food processor, process cookies, syrup, and margarine until mixture is smooth. Transfer truffle filling to a bowl and refrigerate for at least two hours, but preferably overnight.
  2. Remove the bowl from the refrigerator. Using a teaspoon or tablespoon (your preference depending on what size you’d like the truffles), scoop out filling and roll into balls and place on waxed paper. Place the balls back in the refrigerator while you work on the next step, or until you’re ready to dip.
  3. When you’re ready to dip, melt chocolate and shortening over a double boiler until smooth. The addition of the shortening is a short cut so you don’t have to spend the time tempering the chocolate. Remove from heat.
  4. Dip the cookie balls into the chocolate, roll around using two forks or two spoons. As each ball is coated, transfer to waxed paper. When all the balls have been dipped, you can move the truffles to the refrigerator to cool and harden.
  5. Truffles can be served immediately after the chocolate is hardened. To store, keep refrigerated in an air tight container.
Advertisement

Mold Baking Part 2 – Lamby Boy becomes a Cake

The Lamby Boy saga continued….

For the cake itself, I used this recipe from All Recipes. I chose this particular recipe because it called out going well with cream cheese frosting. Since that was the type of frosting I wanted to make for my cake, I was sold. I omitted the orange juice mainly because I do not like citrus flavored pound cakes. I added a little more vanilla extract for flavor. The cake was definitely dense and a little dry; I think it would make an amazing strawberry shortcake base if I was to use the recipe in another facet (in other words, not for cake decorating). That being said, it was still quite tasty.

More importantly, it held up! I made the cream cheese frosting using cream cheese, butter, powdered sugar, and vanilla extract. This time I did not need my food processor, I had a hand held mixer.

I chilled the frosting overnight, for no other reason than I wanted to decorate the next day from my mom’s house so I wouldn’t have to transport the decorated cake and risk ruining it. Since I am no longer employed as a professional caterer, I do not have the appropriate vehicle or materials necessary for transport the way I would when I would transport wedding cakes.

As for decorating itself…I took about a half cup of icing and dyed it with green food coloring for grass. I used a rubber spatula to spread a layer of green icing on my oval platter. This also worked as “glue” to keep the lamb from tipping over. I piped some extra green icing to give the illusion of textured grass. For the lamb, I spread one layer of white frosting to act as base – he needs a lot of frosting! I started out this first layer on a cutting board and then transferred him onto the “grass.” For the second layer, I piped the frosting row by row to give the illusion of a curly fleece. Some other recipes call for shredded coconut flakes. I love coconut but did not want that flavor and texture for this particular cake, so I stuck to hand decorating with the piping bag. I piped extra frosting on the top of his head and on his rear to make a tail. For his eyes, I cut a little bit of chocolate. His nose I used a tiny speck of frosting that I had dyed red. Finally, to complete the look, I put some spring colored M&Ms down on the plate to represent flowers, and I tied a colorful spring bow around his neck. Voila!

Sadly or not, no one cut into him on Easter. He was too pretty to mutilate.

Mold Baking


Baking cakes has never been my forte. It is essentially my Achilles heel in the culinary world. Add a mold, decorating, and shapes, and well, I should maybe talk to HBO or Food Network for a comedy pilot. This week, however, I was put up to the challenge by one of my employees to create “Lamby Boy,” also known as an Easter Lamb Cake. Most recipes call for a pound cake recipe because of its density and ability to hold the shape, and my beloved favorite, cream cheese frosting.

What’s the worst that could happen, right? More to follow soon…

Feeble attempt at baking. Note the kitchen covered in powdered sugar and flour...

Here goes nothing!