Getting Crafty – Utensil Holder

chef's journal


As I described when I launched this blog, I have a small galley kitchen. My condo building was built in the 1970s when there wasn’t as much thought put into gourmet-style kitchens. I have since renovated and got new cabinets that reach the ceiling and better utilize space, but I’m always looking for ways to make the space more attractive and functional.

There is a support beam on one side of the kitchen that is part of the whole building, so I cannot alter it. It is dead wall space and currently I have my magnetic knife racks on there. I decided I want to do more with the vertical space.

Since I cook so much, I have accumulated quite a collection of utensils and gadgets. Nothing too gimmicky, but enough that my current caddy was not doing doing it for me. I was inspired by a grid-style system at The Container Store, but it would have required making sure there were holes or something to latch onto on each piece, and it may have ended up looking more cluttered, as not every piece matches or coordinates with each other. The other factor is that I do not want anything to protrude out too far and be obtrusive.

Overstuffed condiment cadd

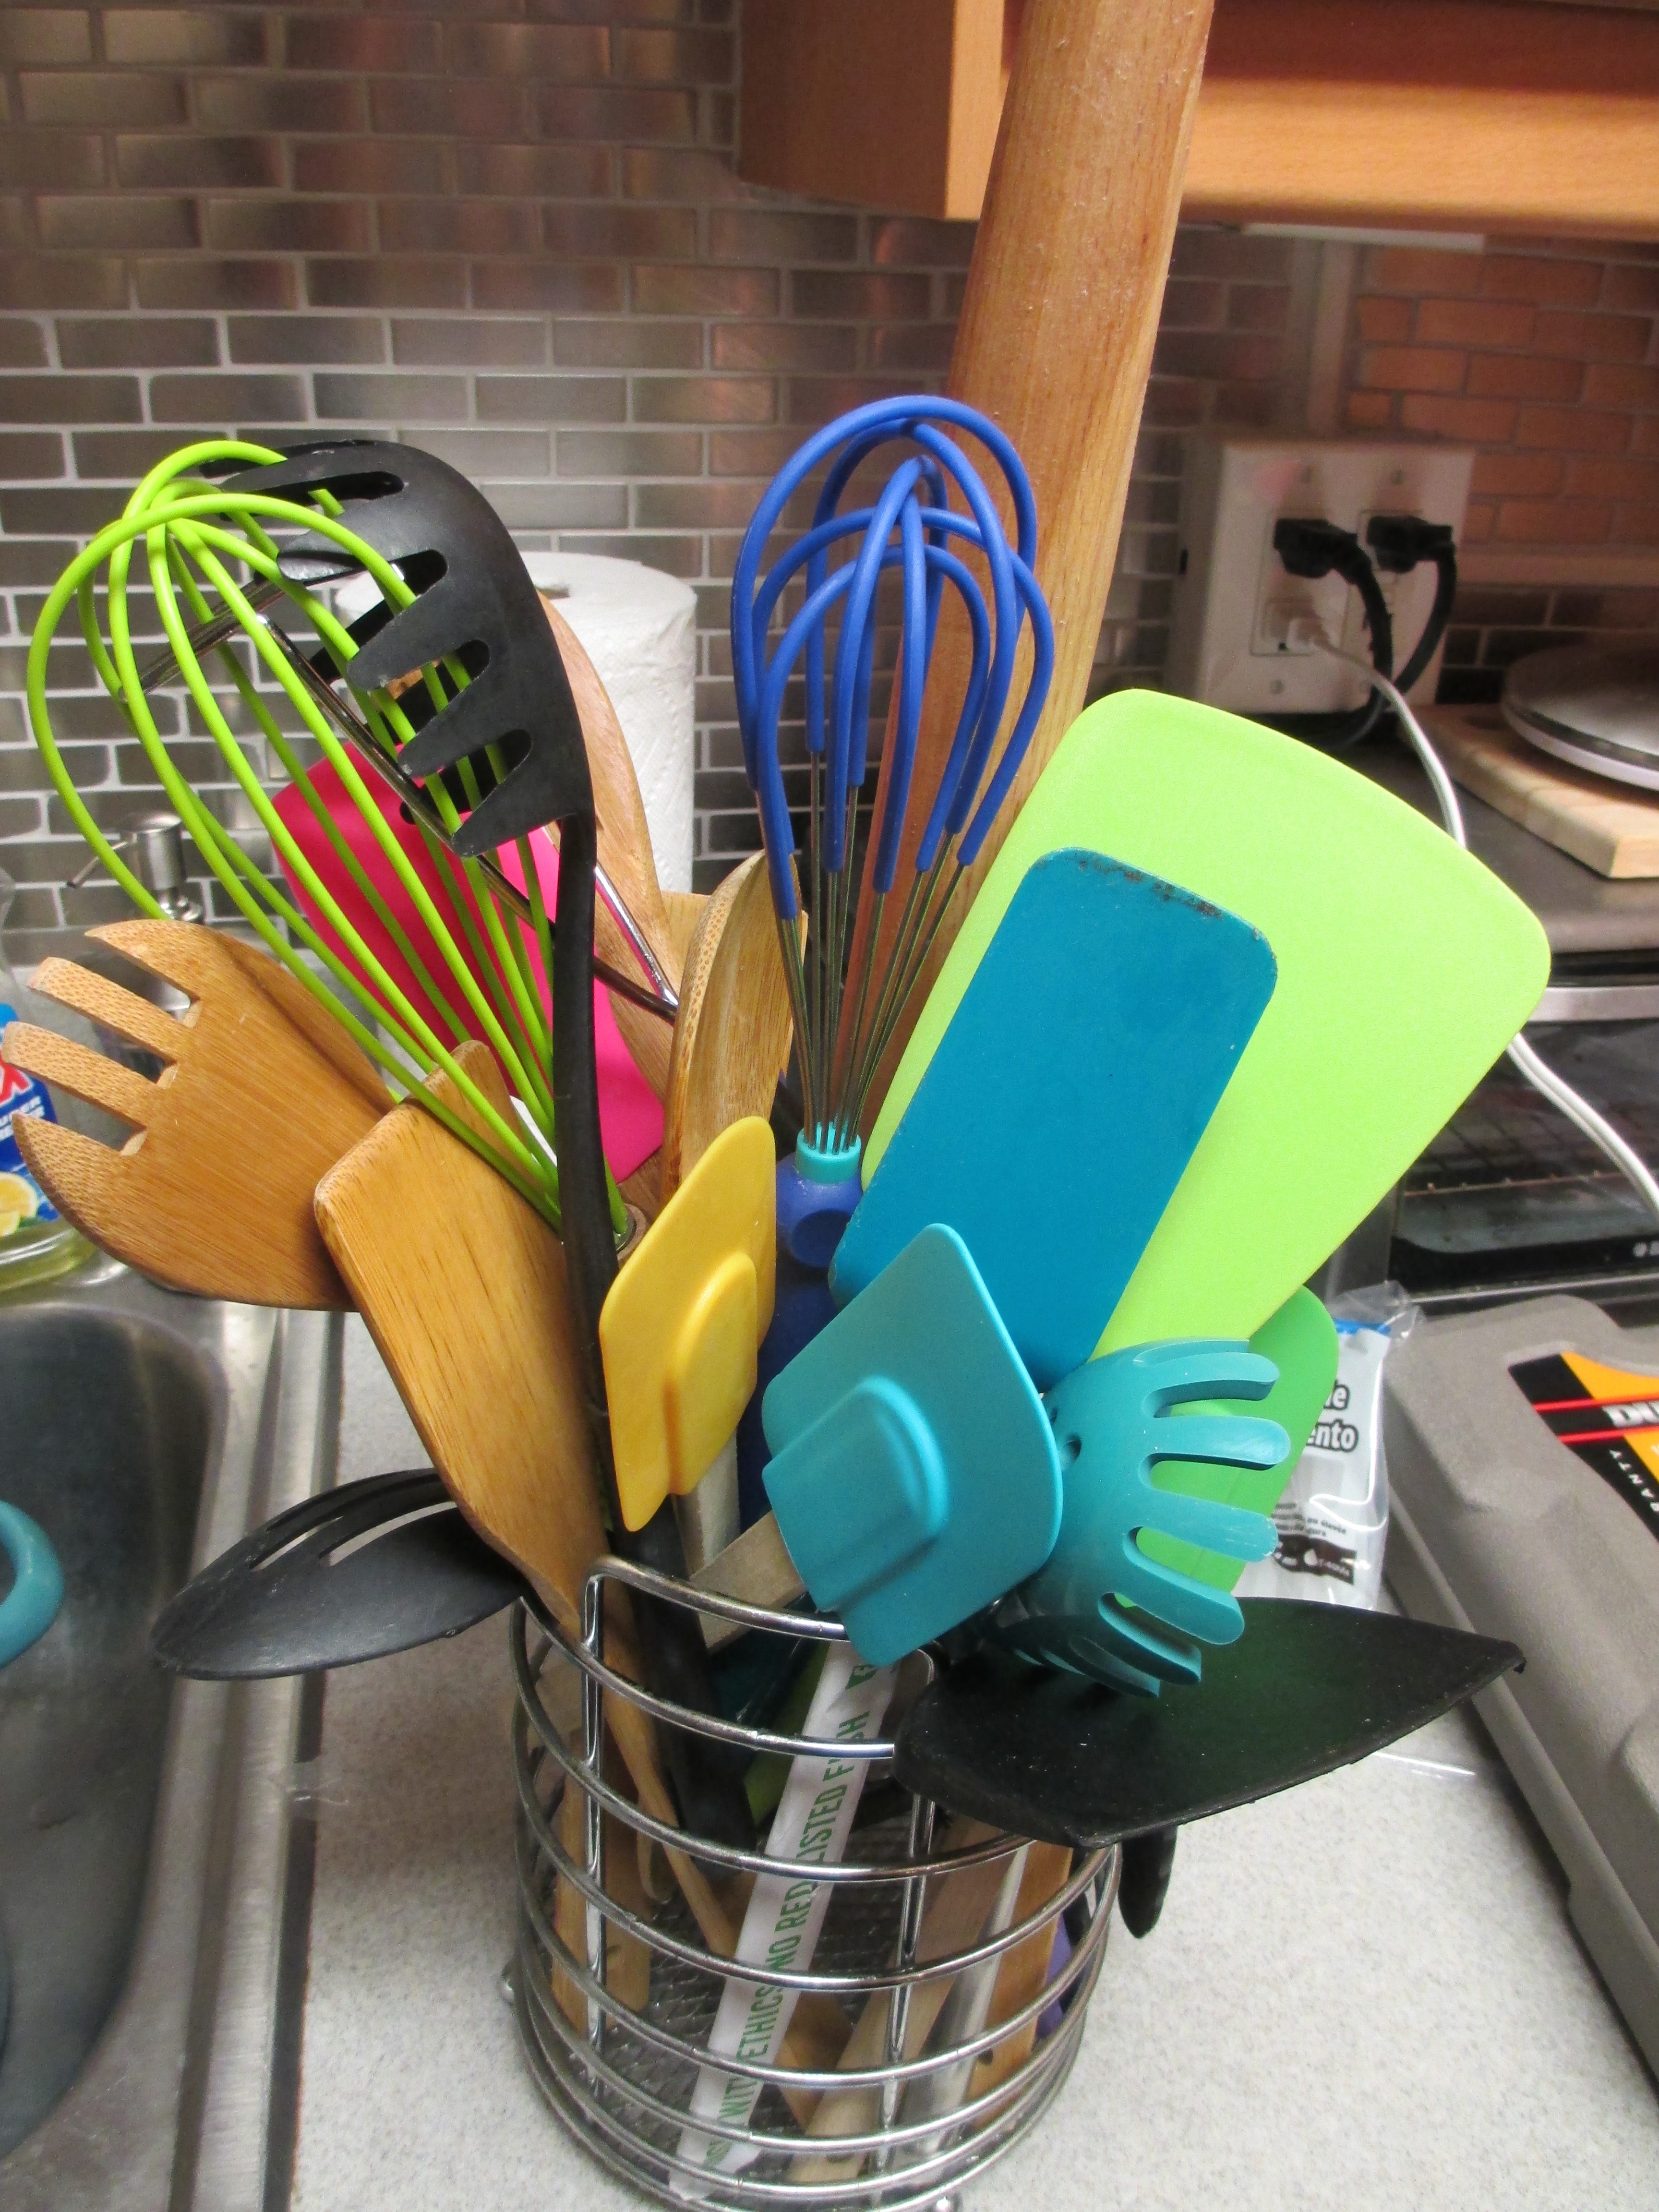
Overstuffed condiment caddy

Continue reading

Advertisement

Rich and Indulgent Hot Chocolate – Powder Free!

AC_PANTRYPROJECT


Awhile back I bought this Stonewall Kitchen Bittersweet Chocolate Sauce thinking it would change my life. I expected it to taste similar to hot fudge, but instead it was more like a bark of very dark chocolate with some corn syrup to soften it. It’s not a bad flavor, I just like my chocolate sauce to be able to stand on its own (think eating straight from jar on a depressed night). This product is a true topping/condiment – it is meant to enhance.

By now you probably realize my love of chocolate. I discovered this sauce makes a super rich, indulgent hot chocolate in less time than it would take you to boil water to dissolve a commercial grade packet in. The ingredients are premium and high quality – and heated up tastes like a luxurious ganache, hence the perfect hot chocolate base.

IMG_1098

Feel free to play around with the amount of sauce for your desired consistency. I like 2 tablespoons of sauce per 1 cup of milk. I used nonfat milk, but you can also play around with other fat milks or milk alternatives like almond mind.

“INSTANT” HOT CHOCOLATE
3 tablespoons Bittersweet Chocolate Sauce
1 1/2 cups Nonfat Milk
1 teaspoon Vanilla Extract
Pinch of Sea Salt

In a small sauce pan, heat chocolate sauce over low heat until melted and smooth. Whisk in milk, vanilla, and salt. Heat mixture until hot but not boiling. Top with your favorites – whipped cream, marshmallows, sprinkles, candy canes, etc. Enjoy!


IMG_1099

Melting sauce in sauce pan

IMG_1102

COST PER SERVING: $1.49
Chocolate Sauce – $.75
Milk – $.69
Vanilla and Salt – $.05

Compound Butter

AC_PANTRYPROJECT


Compound Butter. You’ve probably eaten it on top of a fancy steak or slathered on a fresh ear of corn. And in reality – it is one of those fancy things that isn’t really fancy at all – at least to make. All you need is some softened butter and your imagination.

I always make a compound butter when I make garlic bread or crostini. It’s a great way to insure all the ingredients are well incorporated, and it is a much higher quality product than spreading some butter and topping with garlic powder.

Last week some good friends came over and we made FOS (French Onion Soup) together. I like making the crostini I put in the soup aromatic, so a compound butter was in order.

This became part of The Accidental Pantry Project as compound butters are one of those wonderful things that you can whip up with whatever is on hand. The method above yields one cup of butter and cost less than $4 to make.

Getting Crafty – Liquid Hand Soap

chef's journal   Sometimes my kitchen needs to be used for more than just food. Being snowed in so much this winter, I’ve been wanting to do some other experiments. Back when I worked at Whole Foods Market, we often had promotions for this amazing bar soap by Alaffia called Good Soap. It’s all natural and loaded with shea butter goodness. The only problem – I’m not a bar soap kind of gal. I like liquid hand soaps and body washes. Thanks to my Pinterest obsession, I figured out how to convert these lovely bars to creamy liquid-y hand soap. All you really need is a 1:12 ratio of soap to water. If the results are too thick, just add a bit more water. The process is easy, but there is a lot of resting, so this project will take you about 12-36 hours.

I weighed a bar of soap to figure out how much water I would need. I used 3 bars of soap, so approximately 45 ounces of soap. Rather than using 540 ounces of water, I started with a gallon of water and rolled the dice. Actually, my math was bad and I estimated a gallon and a half of water forgetting about the other two bars LOL

I weighed a bar of soap to figure out how much water I would need. I used 3 bars of soap, so approximately 45 ounces of soap. Rather than using 540 ounces of water, I started with a gallon of water and rolled the dice. Actually, my math was bad and I estimated a gallon and a half of water forgetting about the other two bars LOL

You can grate or chop up the soap. I was surprised how easily this crumbled.

You can grate or chop up the soap. I was surprised how easily this crumbled.

Soap crumbles ready to mate with water.

Soap crumbles ready to mate with water.

Simmer the soap with water until soap is fully dissolved in one soapy solution. I am sorry this is not more exciting.

Simmer the soap with water until soap is fully dissolved in one soapy solution. I am sorry this is not more exciting.

Allow mixture to sit for 12 hours. It should NOT be one gelatinous bar of soap like this. I ended up adding another half gallon of water, simmering again, and letting it sit about another 12 hours - a total of 1.5 gallons and a day of work.

Allow mixture to sit for 12 hours. It should NOT be one gelatinous bar of soap like this. I ended up adding another half gallon of water, simmering again, and letting it sit about another 12 hours – a total of 1.5 gallons and a day of work.

This yields a fuckload of soap. And cleaning the dishes is easy!

This yields a fuckload of soap. And cleaning the dishes is easy!

Cashew Butter

AC_PANTRYPROJECT

As I am reading up on what else to make with my abundance of Vega One Nutritional Shake, I noticed a lot of the recipes I am finding include cashew butter. A few months back I bought a Vitamix and have made walnut and almond butters before. Similar to hummus, making these nut butters from scratch allow you to play around with the ingredients, texture, etc., while allowing you to know exactly what you are putting in your body.

Nuts and nut butters can be expensive, so making your own can be quite money saving.

This recipe yields about 1 1/2 cups Creamy Cashew Butter.

IMG_1042

CREAMY CASHEW BUTTER
2 cups Cashews
2 tablespoons Coconut Oil, melted
Pinch of Sea Salt
1/3 cup Water, optional

Using a rubber spatula, remove from blender and put in desired jar or container. For optimal freshness, store in refrigerator. BONUS – some of the butter will be stuck under the blade. Follow the recipe for Fudgy Chocolate Breakfast Smoothie to utilize the last of the butter. Smoothie will be creamier and more indulgent!

COST FACTOR (per my inventory):
$3.65 per 1.5 cups, or $.31 per ounce
Cashews – $3.50
Oil and Salt – $.15
Leading brands such as Jif or Artisana sell for $.58 – $.94 per ounce, more than twice the cost!

IMG_1047

Fudgy Chocolate Breakfast Smoothie

AC_PANTRYPROJECT

This week I am doing a cleanse and am trying to eat a little cleaner while I pop a ridiculous amount of pills and supplements that are supposed to help me detox. One of the things I had in excess in my inventory is Vega One Nutritional Shake in French vanilla. It’s a pretty sweet supplement with lots of protein, greens, vitamins, and fiber. While you can mix it with just water, it’s a little blah and gritty on its own. I have tried the French vanilla with fruits like berries and grapefruit, but the vanilla flavor overpowers and the flavors don’t really complement each other. Instead, I now take more of a dessert-like approach with bananas and cacao. The results are a dark chocolate fudge-like treat that is actually pretty good for you and under 300 calories – perfect for meal replacement. Give it a try and let me know what you think!

BONUS – this smoothie is vegan!

To make the smoothie - 1 1/2 cups unsweetened vanilla almond milk, 2 tablespoons raw cacao powder, 1 scoop French vanilla Vega One, 1 banana. Blend with a handful of ice until smooth.

To make the smoothie – 1 1/2 cups unsweetened vanilla almond milk, 2 tablespoons raw cacao powder, 1 scoop French vanilla Vega One, 1 banana. Blend with a handful of ice until smooth.

COST PER SMOOTHIE (per inventory, the Vega One and Cacao Powder have a high retail value when purchased full price)
$3.46
Vega One – $1.82
Banana – $.19
Almond Milk – $.82
Cacao Powder – $.63

Five Ingredient Iced Chocolate Loaf Cake

AC_PANTRYPROJECT

My fascination with canned pumpkin and baking continues. And my love affair with butterscotch chips and their versatility is unwavering. The shitty winter weather we have been experiencing in the Northeast is making me churn out recipes like a workhorse. There’s not much else to do with my spare time that won’t cost me much money. Luckily I have plenty of friends ready to come over and be taste testers!

Today I wanted to up the ante from the simple Pinterest-esque pumpkin and cake mix recipes. The goal was tasty and elegant, but still simple and streamlined. Thus a nice pound cake-like loaf cake with a butterscotch icing fit the bill.

IMG_1032

What you’ll need:

  • Standard sized Chocolate Cake Mix (I used Arrowhead Mills)
  • Can of Pure Pumpkin (14-16 ounces)
  • Butterscotch Chips (1 cup for cake, 1/4 cup for icing)
  • Salt
  • Coconut Oil

Preheat oven to 350 degrees. Lightly grease a standard loaf pan with a bit of cooking spray. Using a wooden spoon, mix together cake mix and pumpkin until well incorporated. If mixture is too thick for your liking, mix in up to 1/3 cup water.

Stir in butterscotch chips. Bake at 350 degrees for about 40-45 minutes, or until the cake passes the toothpick test and pick comes out clean. Set allow to cool completely before icing. To make icing, use a small saucepan to melt the remaining chips with about 1 teaspoon of coconut oil and a 1/2 teaspoon of salt. Set the burner on low – chips melt super fast – faster than chocolate – and the icing only takes a minute. Drizzle or frost the top of the cake. Allow time for icing to set, and slice and serve.

Cake is cooling

Cake is cooling

Icing takes no time to make, about a minute!

Icing takes no time to make, about a minute!

Arancini – Italian Style Rice Balls

AC_PANTRYPROJECT


Growing up in Northern New Jersey, especially a town like Waldwick, I was exposed to a ton of Italian and Italian American food. It wasn’t until about the time I was in grad school that I discovered Arancini at a casual Italian deli. It is not something I choose to eat all the time, but it did not make me less hooked on its awesomeness.

After poring over some recipes, I decided to give it a shot, especially as I had all the ingredients I needed. I chose to make two types of filling – mozzarella and sausage. For a dipping sauce, I spiced up some Rao’s marinara with sausage, spices, and cheese. I enjoy making my own sauce from scratch, but Rao’s is really a great base in a time crunch.

For the rice, I did not have any arborio or Italian rice. Instead I went for the Thai Jasmine rice that I wasn’t loving in my Pineapple Fried Rice. The texture is very sticky, which I felt would fare well in rice balls. The end result was actually pretty awesome – the texture of the rice ball was less dense and more fragrant than traditional arancini, and they did not feel like a brick in my stomach.

This was a really great Pantry Project recipe – the only refrigerated items were the mozzarella and eggs, which are stuff I usually have on hand. Everything else was in my pantry or freezer. Great recipe to remember for a cold, snowy winter day. This recipe yields 16 rice balls – 8 sausage and 8 cheese.

Continue reading

Blue Cheese Crackers

AC_PANTRYPROJECT

After my debacle with the weevils, I was able to make the Bon Appetit recipe I wanted to replicate. I actually have made many variations of the Roquefort Crackers I read about, as I used to like to make cheese straws and cheese crackers for gifts around the holidays. What I love about the recipe is that it is a 1-1-1 ratio of ingredients: 1 cup flour, 1 stick butter, 1 cup cheese. You can then play around with everything else to essentially create a savory, cheese blasted shortbread.

For the blue cheese crackers, I did just that – 1 cup flour, 1 stick butter, and 1 cup blue cheese crumbles. I let the butter and blue cheese come to room temperature, and I mixed it all together with my hands, similar to kneading dough. I added some cracked pepper and Worcestershire sauce to enhance the flavors, instead of cayenne. I prefer cayenne with cheddar or Parmesan when making these. I then rolled the dough out into a log shape, similar to store-bought cookie dough, and wrapped it in plastic. The Bon Appetit recipe says to leave it in the fridge for 12 hours, but I only did for about 4. I do not see how 12 is necessary unless you want to make the dough ahead of time and let it sit overnight. When I was ready, I preheated the oven to 400 degrees, sliced the log into 1/4″ thick discs, and pressed them into a ramekin of sesame seeds to garnish and add a extra element of flavor and crunch. img_0976

Weevil Rascals

AC_PANTRYPROJECT

My pantry project hit a snag as I discovered weevils in a bag of flour I just opened. I’m going to go through my pantry now and make sure they didn’t end up in any other grains or sugars.

I WAS going to make some blue cheese crackers. Stay tuned….

Looks like I may need to buy some flour. Hopefully not much else. 😦

UPDATE – I only found them in a box of grits. I’m not going to replace the grits because I have both cornmeal and polenta.