Carnitas 3 Ways – Part 1 – Street Tacos

In pre-pandemic times I would host many dinner parties and cook for others. It’s obviously been increasingly difficult in the past year to cook for more than just myself and my boyfriend (Who isn’t even with me seven days a week to have all our meals together).


I enjoy batch cooking but I also do not enjoy eating the same thing over and over again. I like variety so one of the things I enjoy doing is reworking leftovers. One way I do this is by making a bit batch of some sort of protein, so then dinners come together quickly with this base already done.


I was in the store the other day and there was a nice price on pork butt so I decided to take advantage. Even though I got one of the smaller pieces it was still over 3 pounds. One of my favorite preparations for pork butt is Carnitas and specifically preparing it in a pressure cooker. I cannot take credit for the recipe that I use, you can find that recipe from My Lilikoi Kitchen here.


I probably made 4 to 5 different dishes this week with all the Carnitas I made. Just my luck that the boyfriend is on a diet so he is reluctantly avoiding some of my cooking. I’m sharing the three ways I enjoyed this protein dolled up most.

The meat after it was finished in the pressure cooker
The meat shredded and finished under the broiler for some crispy edges


FIRST UP – CLASSIC STREET-INSPIRED TACOS

This recipe is not really about quantity but what I like to have on hand when I making tacos. I am a huge advocate of soft corn tortillas, they are my favorite for a taco. Remember you cannot take those puppies straight out of the package and enjoy them they must be heated up. Are usually just warm mine up in a skillet. I have yet to find that Abuela who is going to give me homemade tortillas and right now I don’t have the time to make them myself.

For tonight‘s tacos:

  • Soft corn tortillas
  • Carnitas
  • Cilantro
  • Lime
  • Fresh Guacamole (not pictured)
  • Quick Pickled Red Onion
  • Queso fresco

The picture is pretty self-explanatory assemble with your desired ingredients. I like red or white onions on tacos but when they are completely raw I don’t like having bad breath for days. As I’m getting the rest of my dinner ready I take the diced onion and let them soak in a bit of white vinegar, orange juice, and salt. This takes the “bite” out of the onion while still maintaining crunch and enhancing flavor.

Advertisement

Grilled Garlic Cilantro-Lime Shrimp with Spicy Asian Black Bean Slaw

Some pictures came up on my social media feed this other day, including this beautiful shrimp dish I put together a couple of years back for a culinary class I was teaching. This meal is a quick and healthy weeknight dinner.

Grilled Garlic Cilantro-Lime Shrimp with Spicy Asian Black Bean Slaw

SHRIMP
1 Pound Shrimp (21-24 count)
Marinade
3-4 cloves minced Garlic
Juice of 1 Lime
1/4 cup Neutral oil
1/4 cup chopped Cilantro 
Salt and pepper 
SLAW
Dressing 
1/4 cup Liquid Aminos
Juice of 2 Limes
2 tbsp Rice wine vinegar
1/4 cup Neutral oil (vegetable, grapeseed, canola)
1 tbsp Korean Chili Paste
Cracked black pepper
Veggies
2 cups Cabbage, shredded 
2 cups Red cabbage, shredded
1 cup Carrots, shredded
1 bunch Scallions, chopped
1-2 Jalapeños, minced 
1/2 bunch Cilantro, chopped
1 tbsp Sesame seeds 
2 cans (14 ouce) Black Beans, drained and rinsed

Preparation

  1. Combine marinade ingredients, toss with shrimp and set aside. This can be done ahead
    of time up to 24 hours, or you may marinate as you prep the slaw
  2. Combine slaw dressing ingredients and set aside
  3. Chop veggies for slaw as directed (shredded, minced, etc). Mix all the veggies together,
    and gently fold in black beans. Toss with dressing and garnish with sesame seeds. Slaw
    can be made up to 24 hours before serving
  4. Heat a grill or grill pan. Cook shrimp about 1-2 minuets on each side, careful not to
    overcook
  5. Serve shrimp immediately

Green Beans with Garlicky Miso Sauce

As has been my pattern since the beginning with this blog, I haven’t posted in months. 2020 was quite the year. My last post was April 14, 2020. 11 days later, my father passed away, coincidentally on my mother’s birthday. We were only 6 weeks into quarantine and the pandemic and the weeks leading up to his death we were not allowed to see him at all. We didn’t know what we didn’t know back then. The grief comes in waves, especially not having the appropriate closure…

About a month after his passing, my real estate career just blew up. Like many agents around the country, my business fell into this highly competitive seller’s market. I was fortunate enough to be on the listing side for the bulk of my deals and benefited tremendously, finishing the year with nearly $6 million in volume and also achieving the coveted New Jersey Realtors Circle of Excellence award I was striving for since beginning my career.

My dad with my nephews celebrating in last birthday in June 2019 – he was 76

The good news is I’ve been cooking as always. Except for around the holidays where I was ordering takeout because I was so busy, the bulk of my meals continue to be homemade. Over the next few weeks I’ll be sharing some of my favorite pandemic eats.

A couple of months back my boyfriend (still waiting #buythatring) and I were up in Beacon, NY. I had been showing some houses in the area and since we were upstate we decided to go together and make a day of it. We stopped and had lunch at a gastropub. When ordering my sandwich I wasn’t in a french fry mood, and my server raved about their green beans. She was not wrong, they had a luxurious, umami packed sauce. While I haven’t been able to replicate it fully, I do think the magic ingredient was miso paste. Since that outing I’ve been preparing green beans almost exclusively like this.

New Year’s Eve meal with my man – steak with chimichurri, grilled shrimp, and the green beans
Browning the garlic so it’s nutty but not burned in a key to this dish
Deglaze the mixture with a bit of water and you’ll get a luxurious, umami packed sauce

GREEN BEANS WITH GARLICKY MISO SAUCE

This recipe is more about technique than quantity. Taste and feel, season to your individual likes. Quantities are approximated.

In a medium stockpot or large saute pan, bring water to a boil. Add your green beans (about a pound) and cook until just about al dente. Drain and blanche. You’ll be cooking/blistering them in the sauce later, so important not to overcook.

In the same pan, heat a mixture butter and a bit of oil over medium to high heat. Add about 1/4 cup of fresh, chopped garlic. Saute for about 5 minutes or until the garlic starts to brown. Add the green beans and cook for 2-3 more minutes or until the beans start to brown and blister a bit. Add a heaping tablespoon of miso paste and stir into the dish. Cook for another minute or so. Finish with about 1/4 cup of water and stir the entire mixture until the miso and garlic are fully incorporated. Adjust seasoning with salt (or more miso) and pepper as needed.

The green beans are best served immediately – piping hot. If serving later or reheating leftovers, be sure to fully heat before serving.

Hunkering Down – Smarter Food Shopping

IMG_5132

This morning over a “diner style” breakfast of eggs, bacon, and hashbrowns, my boyfriend asked me, “How are you able to have so much fresh stuff on hand to cook with? Aren’t you scared it’s going to go bad?” I told him I’m not.

Friends – it’s strategy. While in an ideal, healthy world it’s great to hit up the grocery store several days a week and get the freshest ingredients possible for you and your family, these are unusual times. All the warnings we have gotten the last couple of days is it will get worse before it gets better – this pandemic and the crisis in our area has not peaked, we could be weeks, probably longer, from leveling that curve. In Bergen County, New Jersey, where I live, we have the highest number of coronavirus cases in New Jersey, and we are only a few miles from New York City, which is currently the unfortunate epicenter of the pandemic. Our county parks have closed, and all the warnings heed staying home as much as possible, only go out if you absolutely have to.

66AB955C-1D65-4D7B-9DCC-141FC3FD0270

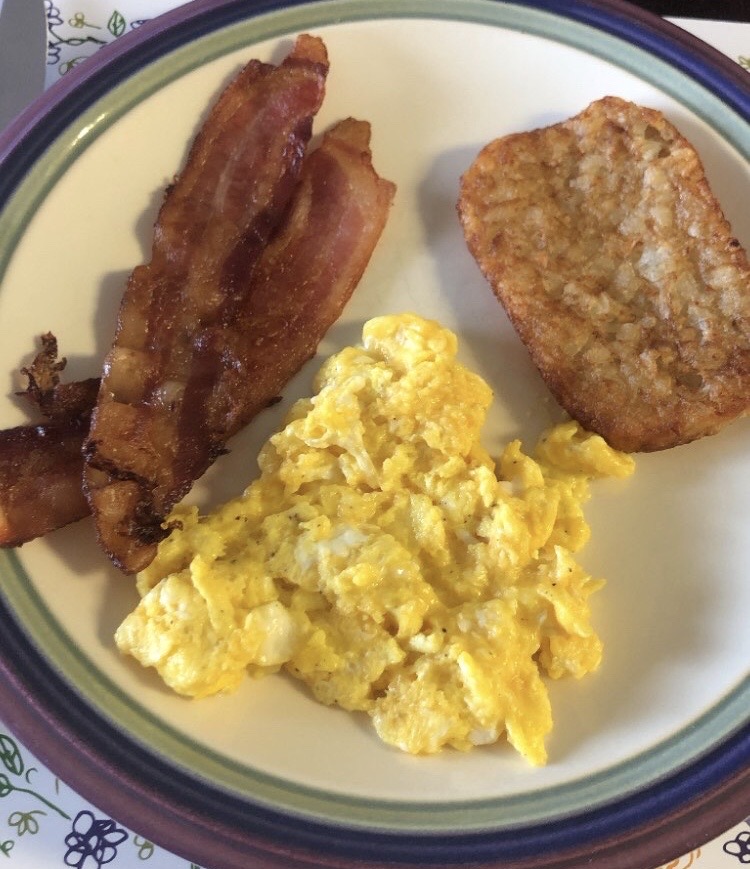
“Diner-Style” Breakfast – all long shelf life ingredients – eggs, cheddar cheese, bacon, and frozen hash browns

Part of staying healthy is following a healthy diet. You have the most control when you’re preparing your own food, and avoid processed ingredients as much as you can. This can be difficult when you’re stockpiling for days and ideally, weeks, but the good news it’s not impossible.

In addition to the hefty amount of items I currently house in my pantry, today I stockpiled fresh foods. I do not intend to go to a grocery store again for a couple of weeks minimum. The key to doing this is to choose items that have a long shelf life, or things that can freeze beautifully.

Don’t know where to start? Here are some of my go-to’s and how long they could last, if properly stored. This isn’t a comprehensive list of all the foods out there, but it can get you through several weeks and possibly even months without a grocery trip.

  • PRODUCE
    • Citrus fruits – 3-4 weeks
    • Butternut Squash – left whole, this will keep about a month
    • Onions and Garlic – about two months
    • Cabbage – several weeks up to 2 montns
    • Carrots – lasts 3-5 weeks
    • Cruciferous vegetables (Broccoli, Cauliflower, Brussels Sprouts, etc) – up to 2 weeks
    • Bananas – last about a week if “green” when purchased. Freeze well
    • Hearty Greens (Kale, Arugula, etc) – these raw veggies will usually last about a week to 10 days
    • When in doubt, buy frozen – especially berries as they are highly perishable. Plus frozen produce is almost always as nutritious as fresh
  • DAIRY
    • Organic milk – ultra pasteurized milk will last about two months
    • Hard Cheeses – parmesan, etc. can last for a couple of months
    • Yogurt – if unopened, can be eaten a couple of weeks after sell-by date
    • Sour Cream – similar to yogurt
    • Cream Cheese – months
    • Semi-hard Cheeses (cheddar, mozzarella, swiss, etc) – months. These also freeze well
    • Eggs – usually will last a few weeks after sell-by date. Try this water test to be certain of the freshness
  • MEAT
    • Vacuum-sealed meats typically have a much longer shelf life than what the butcher will cut and package for you. For example, I purchased a couple of ribeye steaks today that are vacuum-sealed has have a USE BY or FREEZE date of April 22. That’s nearly a month!
    • Poultry is typically more perishable than beef, pork, lamb, etc. If you’re not planning on using within 3-5 days, I suggest freezing until you’re ready to cook with it
    • Cured meats – bacon, ham, sausages, etc. naturally have a longer shelf life. Some will even last months and all typically freeze well
  • SEAFOOD
    • I avoid buying fresh fish and seafood if I’m not going to cook it within a day of purchase. If I find a sale, I may purchase and cut/portion out myself and wrap to freeze. I especially like to do this with salmon. I will take the fish out of the freezer when I’m ready to actually use it
    • Shrimp is something I almost always have in my freezer. In some water they take next to no time to thaw and also cook up super fast. Plus, in this country almost all the “fresh” shrimp you buy has been previously frozen, so just skip that and buy already frozen
  • BREADS/BAKED GOODS
    • I will typically bake my own stuff, but I don’t make sandwich bread. English muffins will keep for weeks in the fridge. I also really like rye bread in the fridge. Tortillas and wraps typically have a long shelf life (possibly months). Softer breads (white, whole wheat, etc), if you’re not going through them quickly, freeze well. Double check the shelf life. While organic can be better for you and have fewer preservatives, organic sandwich bread gets moldy FAST.

Bottom line – in these unprecedented times, don’t impulse shop. A little planning will keep you home safe for a very long time 🙂


Homemade Kale Chips

IMG_5132

I am not vegan. I am not gluten-free. However, being omnivorous, I enjoy all these things. Back in the years I worked for Whole Foods Market, one of my favorite indulgences (as a price point, not calorie/junk indulgence) was Brad’s Kale Chips, not known as Brad’s Crunchy Kale. The product is amazing, healthy, all-natural, and most importantly, tasty. No offense to Brad, they are pretty darn easy to replicate.

I cannot take credit for the recipe I am going to share, but I will show you step by step in this video how easy they are to make and how little equipment is really needed (no need to invest in a dehydrator!)

Recipe can be found at Kitchn 

PS- the “ranch” version I made is not vegan. Please double check ingredients if you’re using a ranch dip/dressing packet. Buttermilk is one of the key ingredients in ranch dressing, and packets usually have some form of dehydrated milk solids.

Cleaning, Reorganizing, and Taking Inventory of My Pantry

I’m not much of a video person, and this is about 7 minutes of my stream of consciousness of what I’m about to tackle. And it was all done by me on my iPhone and I don’t have editing or framing skills. Either way, being home has helped me tackle the project of cleaning and re-organizing my pantry. I found items that expired in 2017 and 2018.

After I clean my shelves, I’ll take stock of everything I have. I pledge not to replace anything major until I have exhausted what I have on hand. For example, I won’t go out and buy beans before I use all the beans I have. For snacks, I won’t buy anything new until I have exhausted a category (nuts, chips, cookies, etc).

I plan to get creative and think outside of the box with some substitutions. Reach out if you’re stuck or feeling uninspired.

Kiss Me, I’m NOT Irish – Leftover Mashed Potato Cakes

IMG_3955

Reworks are a lot of fun. Taking something you’re bored of and transforming it to something new, with just a few ingredients.

I love vegetable fritters, my favorite is kolokithokefthedes (Greek zucchini fritters). Regardless of the culture or flavors, they all seem to have the same thing in common – you need the base, seasoning, and something to bind it to keep it all together. The binders are usually pantry and fridge staples –  eggs and flour. Different lifestyles (vegan, gluten-free) may have different binders, but the theory is all the same – you don’t want these falling apart in your skillet or oven.

In honor of Saint Patrick’s Day, I thought some sort of “Irish” breakfast would be fun. I use Irish loosely, as these cakes have potatoes, bacon, and cheese and typically anything served with eggs can be interpreted as breakfast.

IMG_6443

Mashed Potato Cakes served with Scrambled Eggs and Sour Cream

My current series of posts will be all about taking advantage of what you already have on hand – this will save money, allow you to be less wasteful, and explore your creative side in times when it’s encouraged not to leave the house.

Over the weekend I made some mashed potatoes. I probably had 2 cups worth leftover but wasn’t in the mood to eat them in their current state. In my fridge I had all the fixings for “loaded” potatoes, so these came together quite simply.

LEFTOVER MASHED POTATO CAKES – makes 8 cakes/fritters

  • 1 cup mashed potatoes
  • 1/2 cup shredded cheddar cheese
  • 1/4 cup chopped scallions
  • 3 slices bacon, cooked and chopped
  • 1 egg, beaten
  • 1/4 cup flour

In a medium mixing bowl, combine mashed potatoes, cheese, scallions, and bacon. Add egg until fully incorporated. Whisk in flour until a thick batter forms.

Heat a skillet with 2-3 tablespoons oil. Using a large spoon, drop a large spoonful into cooking oil, forming an approximately 3-inch disk. Fry on both sides until golden brown, drain excess oil on paper towels. Serve with sour cream.

Substitutions – remember this recipe is about technique, it’s not an exact science

  • Play around with the flavors and seasonings. Use what you have at home. Onions, garlic, cream cheese, ham, chopped peppers/hot peppers etc. all work
  • These do not need to be fried! Form the cakes with a touch more flour, brush with oil, and bake at 375 F until golden brown
  • Play around with binders – a bit more flour and some milk instead of egg for those averse to eggs. Up the cheese and eggs, or use gluten-free all-purpose flour for gluten-free. Eliminate dairy and eggs for a vegan version

Ask Anna – I’m Here to Help

IMG_4485

I cannot believe my last post on this blog was back in 2016. And yet, I can believe it. 2016 was the year I was licensed in real estate and also the year I decided to leave retail management for good. As I was building my real estate business, the time for blogging about food subsided. I traded lengthy articles with recipes for quick instagram posts, focusing mainly on the visual, occasionally sharing how things were done.

One of my New Years resolutions in 2019 was to get back in the habit of blogging.  I showed some new friends my old stuff and they were anxious for more. On a happy note for my career, 2019 was my best year in real estate to date, and I just wasn’t home cooking as much, let alone writing about it. I literally traded writing contracts and client emails for recipes.

Life is short, and it’s important to attribute time to your hobbies and passions. With all the fear and uncertainty in the world, especially here in the United States and we are navigating this COVID-19 Pandemic and all the self-quarantine going on around us, I realized I am in a position to help people. This isn’t any sort of grand nobel-peace prize actions. I just have a quirky and unique skill set when it comes to food.

Yesterday at least 3 friends reached out looking for cooking help or advice. As supermarket supplies dwindle and more restaurants shut their doors, cooking well and at home for your family with what you have on hand can be challenging or difficult. I lived through the great recession and I also suddenly lost a very lucrative position in 2015 – both incidents that taught me to be very thrifty and frugal with my food budget, but also creative. You may look at a jar of tahini and think, I don’t even have chickpeas, I only use this stuff for hummus. I will look at that same jar and make sesame noodles, tahini chocolate chip cookies, salad dressing, and more.

Reach out if you’re stuck, I’ll help you find inspiration on a shoestring budget.

Where have I been?

IMG_5132
I knew it had been awhile since I have posted anything. The blog has taken a back burner to retail, working crazy hours during the holidays, working crazy hours post holidays, being in school again, and of course, GrubHub. However, having just popped on the site, I did not realize it’s been three months!

To prove I’m still cooking, but doing more eating than writing, some highlights from my Instagram account and my phone in general. You can follow me at @greekgrl927 and/or search #accidentalchef

  
Bucatini with Sausage and Ricotta

  
Salted Pretzel Toffee Bark

  
Omelet I made at work testing out new products

  
Risotto I made at with that is making me itch for a pressure cooker, if only for risotto…

  
Carb overload. Cod with a lemon butter cracker crust and Greek lemon potatoes

  
Deep Dish Pizza love continues 

  
Beer and Cheese Soup with a Pretzel Bun

  
S’mores Mix