Unknown's avatar

About Anna Papoutsakis

Chef. Writer. Cater. Editor. Culinary Badass.

Kiss Me, I’m NOT Irish – Leftover Mashed Potato Cakes

IMG_3955

Reworks are a lot of fun. Taking something you’re bored of and transforming it to something new, with just a few ingredients.

I love vegetable fritters, my favorite is kolokithokefthedes (Greek zucchini fritters). Regardless of the culture or flavors, they all seem to have the same thing in common – you need the base, seasoning, and something to bind it to keep it all together. The binders are usually pantry and fridge staples –  eggs and flour. Different lifestyles (vegan, gluten-free) may have different binders, but the theory is all the same – you don’t want these falling apart in your skillet or oven.

In honor of Saint Patrick’s Day, I thought some sort of “Irish” breakfast would be fun. I use Irish loosely, as these cakes have potatoes, bacon, and cheese and typically anything served with eggs can be interpreted as breakfast.

IMG_6443

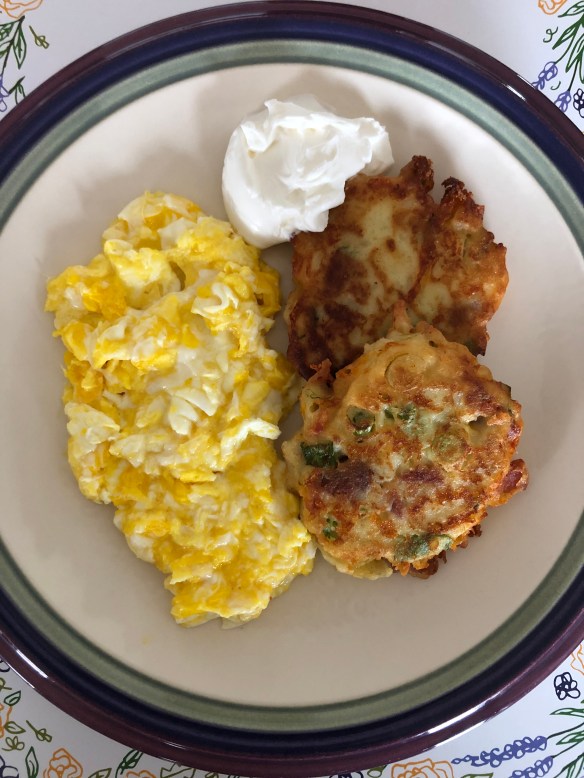
Mashed Potato Cakes served with Scrambled Eggs and Sour Cream

My current series of posts will be all about taking advantage of what you already have on hand – this will save money, allow you to be less wasteful, and explore your creative side in times when it’s encouraged not to leave the house.

Over the weekend I made some mashed potatoes. I probably had 2 cups worth leftover but wasn’t in the mood to eat them in their current state. In my fridge I had all the fixings for “loaded” potatoes, so these came together quite simply.

LEFTOVER MASHED POTATO CAKES – makes 8 cakes/fritters

  • 1 cup mashed potatoes
  • 1/2 cup shredded cheddar cheese
  • 1/4 cup chopped scallions
  • 3 slices bacon, cooked and chopped
  • 1 egg, beaten
  • 1/4 cup flour

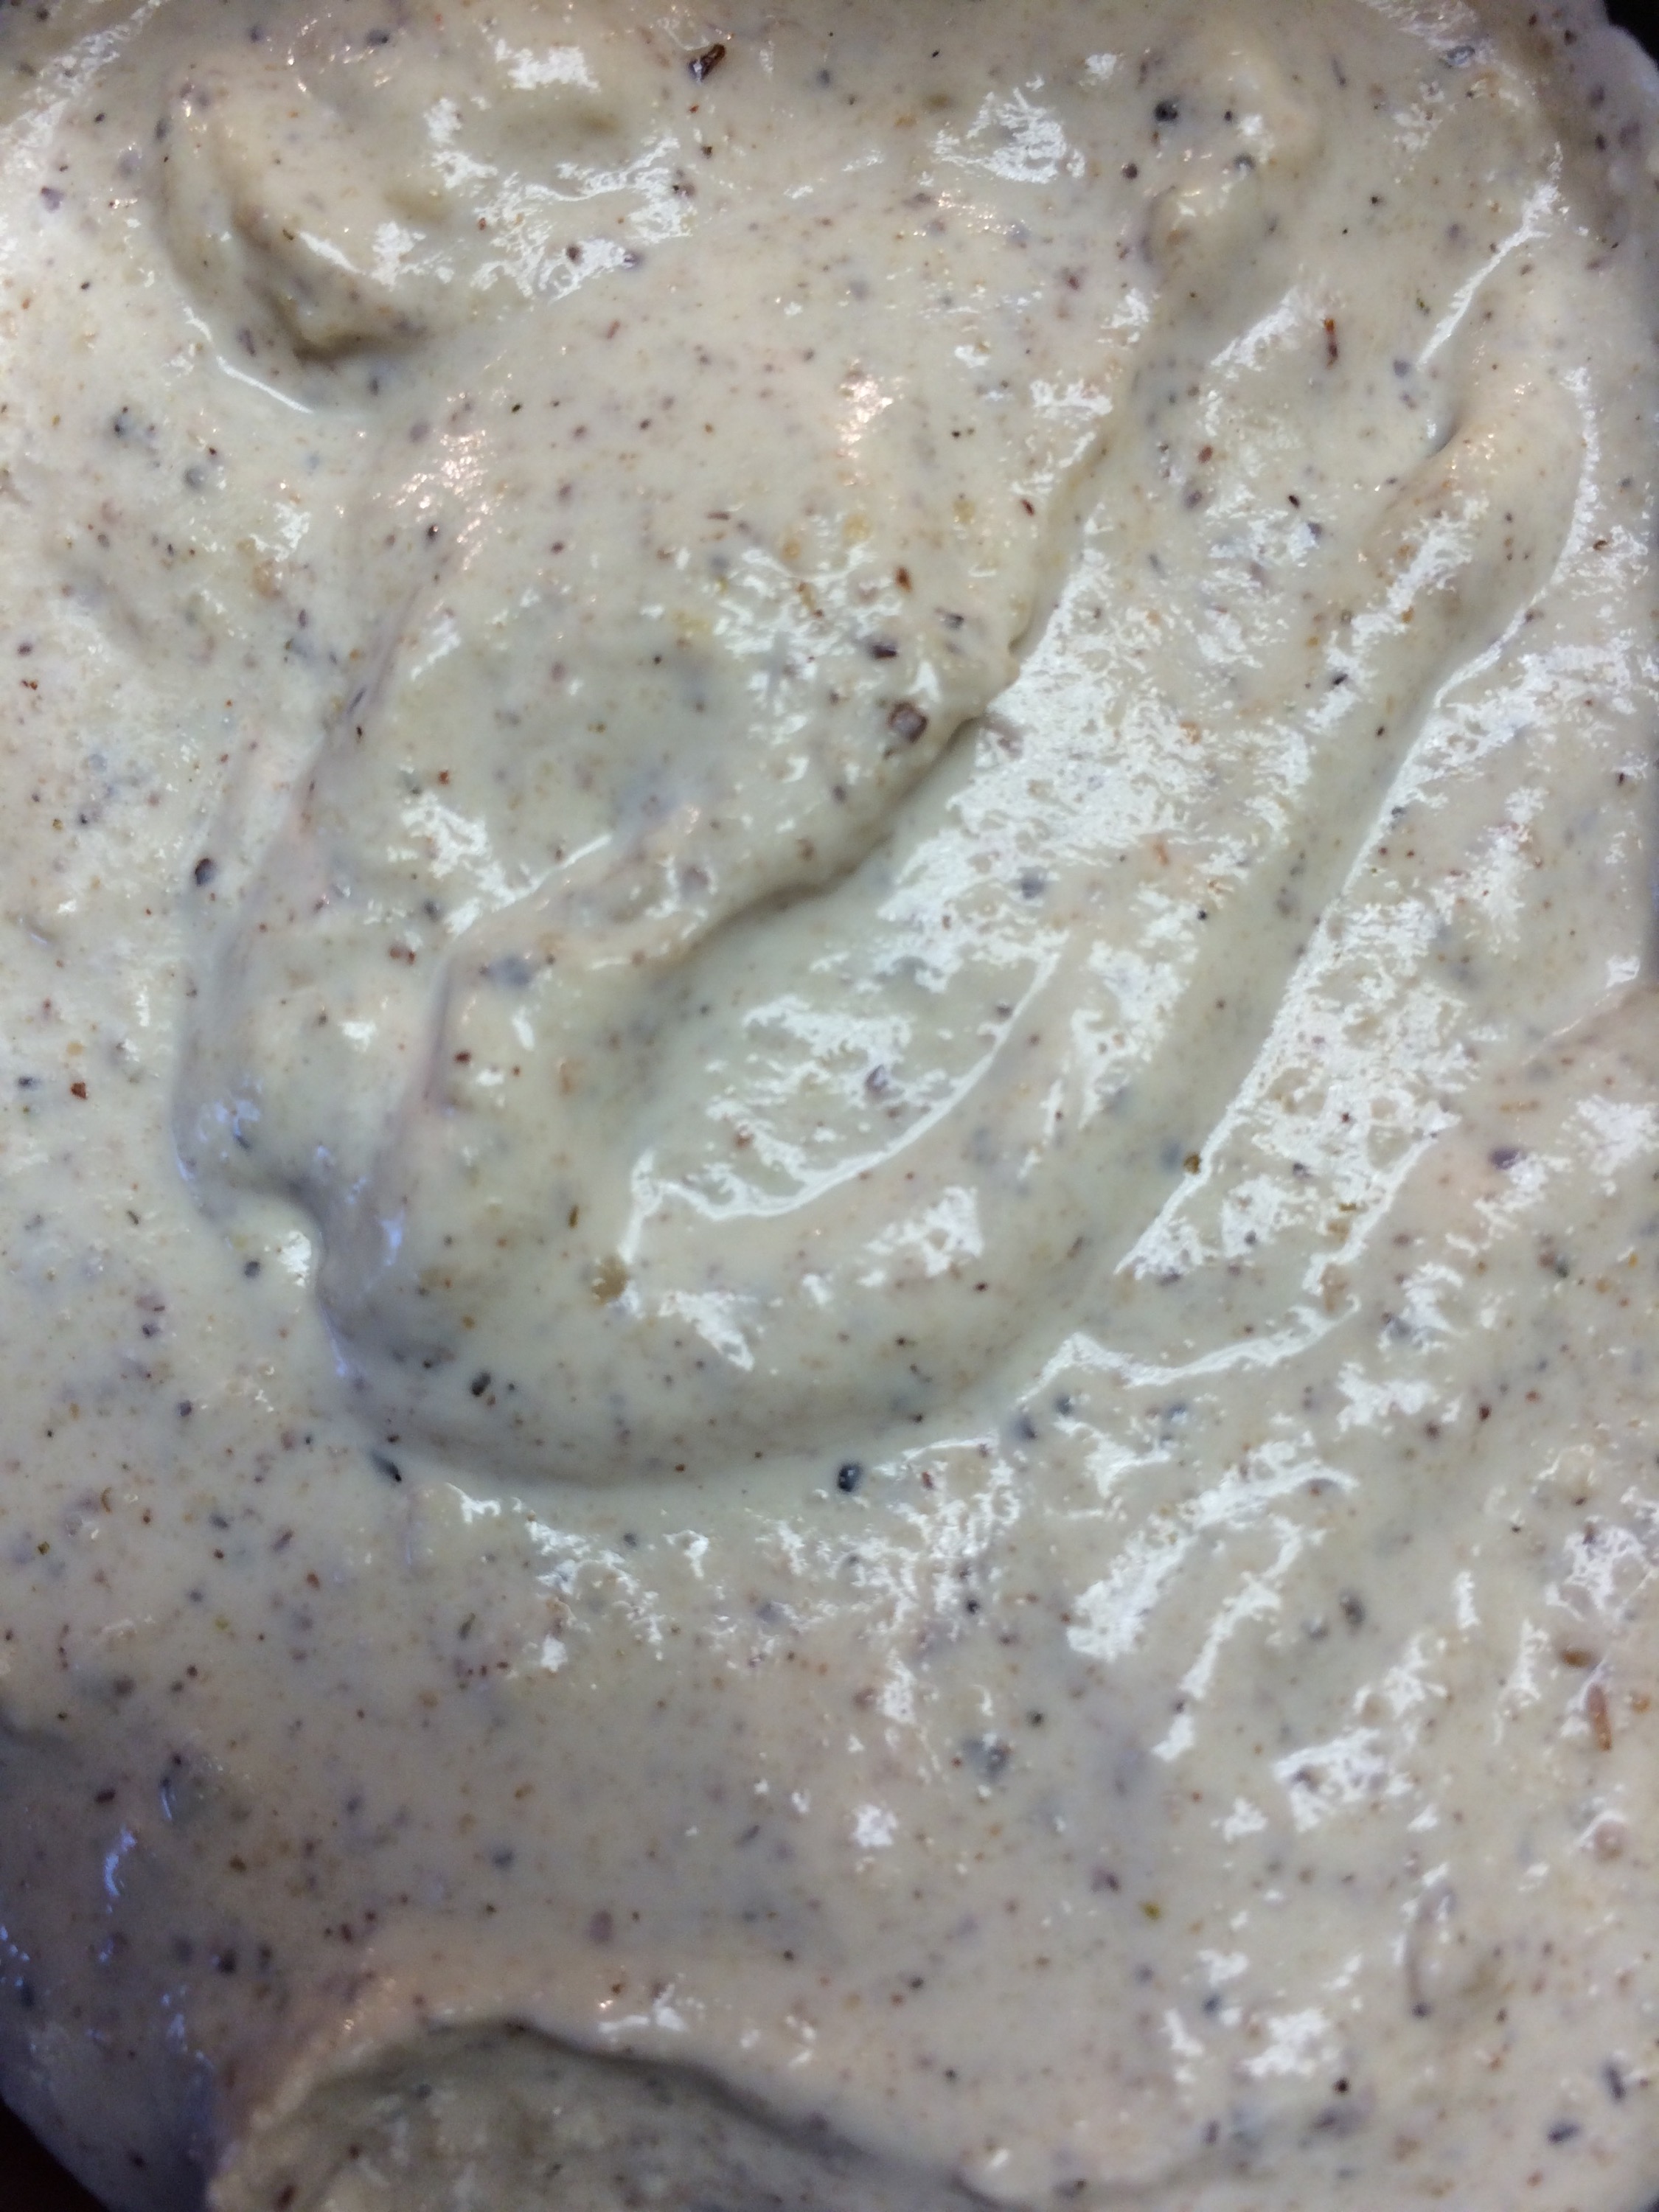
In a medium mixing bowl, combine mashed potatoes, cheese, scallions, and bacon. Add egg until fully incorporated. Whisk in flour until a thick batter forms.

Heat a skillet with 2-3 tablespoons oil. Using a large spoon, drop a large spoonful into cooking oil, forming an approximately 3-inch disk. Fry on both sides until golden brown, drain excess oil on paper towels. Serve with sour cream.

Substitutions – remember this recipe is about technique, it’s not an exact science

  • Play around with the flavors and seasonings. Use what you have at home. Onions, garlic, cream cheese, ham, chopped peppers/hot peppers etc. all work
  • These do not need to be fried! Form the cakes with a touch more flour, brush with oil, and bake at 375 F until golden brown
  • Play around with binders – a bit more flour and some milk instead of egg for those averse to eggs. Up the cheese and eggs, or use gluten-free all-purpose flour for gluten-free. Eliminate dairy and eggs for a vegan version

Ask Anna – I’m Here to Help

IMG_4485

I cannot believe my last post on this blog was back in 2016. And yet, I can believe it. 2016 was the year I was licensed in real estate and also the year I decided to leave retail management for good. As I was building my real estate business, the time for blogging about food subsided. I traded lengthy articles with recipes for quick instagram posts, focusing mainly on the visual, occasionally sharing how things were done.

One of my New Years resolutions in 2019 was to get back in the habit of blogging.  I showed some new friends my old stuff and they were anxious for more. On a happy note for my career, 2019 was my best year in real estate to date, and I just wasn’t home cooking as much, let alone writing about it. I literally traded writing contracts and client emails for recipes.

Life is short, and it’s important to attribute time to your hobbies and passions. With all the fear and uncertainty in the world, especially here in the United States and we are navigating this COVID-19 Pandemic and all the self-quarantine going on around us, I realized I am in a position to help people. This isn’t any sort of grand nobel-peace prize actions. I just have a quirky and unique skill set when it comes to food.

Yesterday at least 3 friends reached out looking for cooking help or advice. As supermarket supplies dwindle and more restaurants shut their doors, cooking well and at home for your family with what you have on hand can be challenging or difficult. I lived through the great recession and I also suddenly lost a very lucrative position in 2015 – both incidents that taught me to be very thrifty and frugal with my food budget, but also creative. You may look at a jar of tahini and think, I don’t even have chickpeas, I only use this stuff for hummus. I will look at that same jar and make sesame noodles, tahini chocolate chip cookies, salad dressing, and more.

Reach out if you’re stuck, I’ll help you find inspiration on a shoestring budget.

Where have I been?

IMG_5132
I knew it had been awhile since I have posted anything. The blog has taken a back burner to retail, working crazy hours during the holidays, working crazy hours post holidays, being in school again, and of course, GrubHub. However, having just popped on the site, I did not realize it’s been three months!

To prove I’m still cooking, but doing more eating than writing, some highlights from my Instagram account and my phone in general. You can follow me at @greekgrl927 and/or search #accidentalchef

  
Bucatini with Sausage and Ricotta

  
Salted Pretzel Toffee Bark

  
Omelet I made at work testing out new products

  
Risotto I made at with that is making me itch for a pressure cooker, if only for risotto…

  
Carb overload. Cod with a lemon butter cracker crust and Greek lemon potatoes

  
Deep Dish Pizza love continues 

  
Beer and Cheese Soup with a Pretzel Bun

  
S’mores Mix

Creamy Crockpot Chicken Stew…and Pot Pie…and Possibilities

IMG_3955
In another pantry experiment, I made a batch of “Cream of Something” soup mix. It’s a lower fat, healthier alternative to canned cream soups, especially as you make it and know exactly what is in it. It is comprised of chicken bullion granules, nonfat dried milk, cornstarch, and dried spices (basil, onion, thyme, pepper). It sounds a little weird but it’s pretty tasty.

Today I decided to make a chicken and rice crockpot stew – just set it and forget it. 

  
What ended up happening is the soup mix turned out to be a base for another base. My stew turned out thick and creamy and while delicious on its own, was screaming for dumplings or crust or cheese and vegetables. So much can be done with such minimal effort.

CREAMY CHICKEN AND RICE CROCKPOT STEW
1 pound chicken thighs
1 cup brown rice
1 chopped onion
1 cup chopped carrots
2 quarts water
1.5 cups cream of something soup mix
Juice of 1 lemon
1 small can corn

  1. Place thighs, onions, carrots, water, and rice in crockpot, set on high.
  2. After three hours mixture will be thick. Add remaining ingredients and set to warm for another half hour. Enjoy!

  
Now you can play! I created an individual pot pie by adding cheese into the stew, topping with pie crust, and baking to golden brown. You can make empanadas, dumplings, casseroles…possibilities are endless and there’s barely work involved!

    Next Experiment – Chicago Deep Dish Pizza

    chef's journal

    I think the inspiration came from some Buzzfeed quiz, where there were a bunch of pictures of pizza and you were supposed to pick one you relate to. Not that I can relate to Chicago Deep Dish, but at that moment it looked the most appealing of all the slices. I have made homemade pizza, but I have never attempted that style.

    One of my best friends is a Native Chicagoan and upon asking him if he has made it, he said he did once, but messed up the crust. This was disconcerting, as the crust is the aspect I am most concerned about executing right. Another friend who loves to cook said he loved eating it when he lived in Chicago, but never made it. Gee, that helps!

    So I do not have enough Chicagoans in my life, nor has anyone in the NYC area that I am close with made it. Probably because we already have awesome pizza around here and do not need to. Oh what a culinary conundrum I am now faced with.

    In scouring the web (ok, Pinterest), I think I found a recipe I liked from a blog called Sally’s Baking Addiction. Instead of doing two 9-inch pies, I’m going to do a 14-inch pie. I liked the crust recipe, especially the incorporation of butter. As for the sauce and filling, it’s pretty basic, but I do appreciate the tip about shredding a block of mozzarella yourself as opposed to pre-shredded. We will see what happens….

    Autumn White Lasagna

    IMG_3955
    I had a butternut squash sitting in my apartment for about two weeks. The time had come to do something. I decided to go for lasagna, but get a bit more creative than the Giada recipe I have used in the past.

    I decided to do something with the squash and walnuts, so I decided instead of doing plain boring ricotta, to use Ligurian walnut sauce, which is sort of like a walnut pesto popular in the Ligurian region of Italy. I fell in love with it when I visited on of my girlfriends about three years ago.

      
    To start, the first thing I did was clean and prep the squash. As I roasted it in the oven, I prepped the walnut sauce. I used no boil noodles and as I was baking I prepped the bechamel. By doing this in stages prep, I didn’t feel a slave to the kitchen, and I made a few other things for lunch for the week ahead.

    My recipe is not exacting, you can definitely play with quantities.

    AUTUMN WHITE LASAGNA
    No-boil lasgna noodles, about 15 sheets
    1 cup ricotta cheese
    1 egg
    3 linked Italian chicken sausage, cut in 1/4 in slices
    1 cup shredded mozzarella cheese

    For the Butternut Squash:
    1 regular sized butternut squash
    olive oil
    salt and pepper

    For the Walnut Sauce:
    1 cup walnuts
    1/3 cup parmesan cheese
    1/4 cup olive oil
    2 cloves garlic
    1 cup breadcrumbs
    1 cup Greek yogurt
    1 tablespoon Italian seasoning
    salt and pepper

    For the Bechamel:
    1/2 stick butter
    1/4 cup flour
    2 cups milk
    1 teaspoon nutmeg
    1 teaspoon onion powder
    dash of Worchestershire sauce
    salt and pepper

    1. Preheat oven to 400 degrees.
    2. Arrange butternut squash pieces on a sheet pan, drizzle with olive oil, salt, and pepper, and toss squash to coat all pieces. Roast for about 30 minutes or until tender enough to mash with fork. Remove from oven, set aside.
    3. Lower temperature to 350 degrees.
    4. Meanwhile, place all walnut sauce ingredients in a blender or food processor. Blend until ingredients are well incorporated, maintaining a little texture. Mixture will be thick. Divide in half.
    5. Take half the walnut sauce and mix with ricotta and egg.
    6. Take the butternut squash and place in a bowl, mash with a masher until blended but still a little chunky.
    7. To assemble, spread a thin layer of the ricotta mixture on the bottom of a 9×13 inch pan. Top with three noodles. Spread half the squash, top with noodles, repeat. Over the second squash layer assemble a layer of chicken sausage, top with noodles.
    8. For top layer, spread remaining walnut mixture and top with mozzarella cheese. Bake covered 25 minutes.
    9. While baking, prep the bechamel. In a deep skillet, melt butter and add flour to create a roux. Cook about 3 minutes until well mixed and blonde in color. Add nutmeg and onion powder. With one hand slowly add milk while whisking with the other. Cook about five more minutes until sauce thickens. Add other seasonings to taste preference.
    10. After the 25 minutes, uncover lasagna and add bechamel on top. Bake another 25 minutes until sauce lightly browns.
    11. To serve, cut in 9 pieces and top each serving with a sprinkle of walnuts.
    12. Tip – if reheating leftovers, prepare some fresh bechamel to top on pieces.


      Croque Monsieur 

      IMG_3955
      Last night I attempted one of my French bistro sandwiches, the simply elegant Croque Monsieur. It’s a fancy sounding name for an elevated ham and cheese sandwich, but once you bite into one, you have to call it by name.

        
      Assembled open faced, finished in the oven, including the broiler should you dare.

      I cannot recommend exact quantities on this, as I feel you just assemble and make it look pretty. The quick bechamel I made was probably enough for two sandwiches, so I will go into a bit more detail with the sauce.

      For the sandwich, I used two medium-thick slices of semolina bread, but any heart sliced bread or baguette will do – Italian, French, you could even go rye, though I prefer a milder tasting bread. I spread a thin layer of super grainy mustard and topped with ham. I then preheated my oven to 400 degrees and got started on the bechamel.

        
      This was not a true bechamel. Instead a made a roux by melting two tablespoons butter and whisked in two tablespoons of flour. When the roux was cooked to a light blond color I added more grain mustard, a pinch of garlic powder (I would have preferred onion powder but I was out), a few dashes of nutmeg, salt and pepper. While whisking over low heat, I added 2/3 cup milk, added slightly more, thinning the sauce a bit more. You want the consistency to fall somewhere between mayo and gravy – thinner than mayo, but not so thin that it drips everywhere. I then added about two heaping tablespoons of Parmesan cheese and a teaspoon of Colman’s mustard powder.

        
      I removed the sauce from heat and continued to assemble the sandwich. I spread about half the sauce I made over the ham on each slice.

        
      I topped the sauce with Swiss cheese (you may also use Gruyere), and placed my sandwich in the oven.

        
      I baked it for about 5 minutes, then switched on the broiler to melt the cheese even more for another two minutes. The result? Heaven.


      Crock Pot Patates Yiahni

      IMG_3955
      I haven’t written a post in about a month. I did some traveling, celebrated my birthday, and have been a little swamped at work. One thing I have been doing a lot of those is batch cooking on Sundays. In the spirit of my pantry project, I continue to seek out ways to save money. I try not to buy lunch at work anymore, or I will treat myself maybe once a week. Instead, I bring lunch, easily saving me $40 a week. Plus mall food kinda blows if you have it daily.

      I’ve done some fun dishes, like butternut squash risotto that I also rework into arancini, and potato soup remains a favorite. In the meantime, with the weather getting colder I’m missing some of the Greek dishes I’ve enjoyed from my mom over the years, like trahana and Patates Yiahni. The latter is a braised potato stew that can be vegan or with meat. Having a few errands to run today, I decided to experiment with making it in a crockpot. 

      What is great about much Greek cooking is the simplicity of the ingredients. For the stew I combined some olive oil, two chopped red onions (you can use any onion, red I just had on hand), a couple of sliced garlic cloves, chicken thighs straight from the freezer, four potatoes, a box of Pomi strained tomatoes, two cups of chicken broth, salt, pepper, oregano, and some bay leaves. Everything went straight in the crock pot, set on high for about four hours. That’s it, and I have lunch for most of the week.


      To serve, add a generous sprinkle of grated Parmesan cheese and you can also eat with some crusty bread, but I like it as is.

      Boiling Rice Like Pasta Has Just Changed My Life

      IMG_5132With all my cooking experience, I still cannot master rice. I mean, I do well when it’s a fried rice or rice balls or something that should have a sticky/mushy consistency. But when it comes to fluffy, individual grains that can stand up on their own, I suck.

      A few years back I even thought I had discovered the secret. Alas, my rice usually came out crunchy, especially brown rice.

      Now I read somewhere to boil your rice al dente like pasta. And…after trying it…I’m a believer!!! If you’re down to seasoning the rice after it boils, this method can work for you, too!

      Another thing that is great about this method is you can throw measuring out the window. The best things to do is soak the rice to take away excess starch, rinse like crazy, and add the rice to your pot, using enough water to cover the rice by a couple of inches. Boil, and taste periodically to your desired consistency. Drain, season with oil, butter, spices, etc, and you’re good to go!