Shrimp and Green Bean Scampi for One

It’s been awhile since I’ve been home on a weeknight and have had time to cook something nutritious. After a killer workout at the gym I wanted to put something wholesome in my body. I rummaged through my pantry and freezer and realized I could put together a shrimp scampi with vegetables. Tonight I opted to mix green beans in with the scampi and serve over Chinese noodles. I figured out the nutrition facts and this tasty dish came in at about 580 calories and less than 11 grams of fat….and I definitely made the portion size a tad too big πŸ˜‰

INGREDIENTS

4 ounces Youmian (thin Chinese style noodles)

For the scampi:
4 ounces medium shrimp – about 20 shrimp
1 cup frozen green beans, thawed
1 teaspooon butter
1 teaspoon olive oil
1 clove garlic, minced
1 teaspoon lemon juice
1 teaspoon red pepper flakes
1 tablespoon fresh parsley
1/3 cup white wine
salt and pepper, to taste

  1. Cook noodles according to package directions. Drain, set aside.
  2. In a large skillet, heat oil, butter, and garlic until garlic starts to sizzle. Add shrimp, lemon juice, red pepper flakes, and parsley. Cook for about one minute, shrimp will be pink and firm.
  3. Add white wine, reduce sauce mixture until liquid is half.
  4. Add salt and pepper, adjust seasoning as desired.
  5. Add green beans, stir until hot.
  6. Dish noodles onto a plate, pour scampi over. Feel free to substitute another pasta or starch. Meal can be enjoyed on its own, or you may add freshly grated Parmesan or pecorino romano.


Single Serve Crustless Quiche

Good for brunch or light dinner. A bit high in sodium. Consider low salt ham.

364 calories, 11 gr carbohydrates, 21 gr fat, 40 gr protein, 1572 mg sodium, 7 gr sugars

  • 2 eggs, beaten
  • 4 ounces ham steak, diced
  • 1 slice swiss cheese, diced
  • 2 tablespoons chopped onion
  • 1 teaspoon maple syrup
  • 1 tablespoon fat free half and half
  • Salt, pepper, cayenne pepper, nutmeg, to taste
  1. Preheat oven to 350 degrees
  2. Grease a single serve baking dish with cooking spray, set aside
  3. Sautee ham and onions until onions are soft, mix in maple syrup. Allow mixture to cool slightly
  4. Mix together eggs, cheese, and fat-free half and half. Add ham mixture and seasonings. Pour mixture into baking dish
  5. Bake for about 25 minutes until eggs are firm and top is slightly browned

Quick Peanut Soba Noodles

I’ve been counting calories lately and overall looking for more balanced nutrition. A friend suggested I give up carbs, especially wheat, but I’m not quite ready. This afternoon I wanted something satiating, slightly comfort-foody, and of course quick. As usual I raided my pantry for what I had, which this time included one neatly wrapped bundle of Blue Dragon Soba Noodles (Japanese-style noodles made in China, but I digress). I checked the nutrition facts and a serving was a whopping 436 calories. However, the serving suggestion was 1/2 of a package, or 125 grams. Using my handy food scale, I weighed out one bundle, about 75 grams. Sounded like a better serving size to me!

Noodles alone were not going to cut it, so I wanted some sort of sauce. I do love me some peanut noodles, so I decided to modify the peanut sauce I often make when I am cooking Asian meals. I was pretty happy with the results and the whole lunch only took me about 15 minutes to prepare. Overall, I am happy with the nutrition of the dish, except it is a bit high in sodium due to the soy sauce I used. I may try to omit the soy sauce and add a bit of water to thin the sauce.

Quick Peanut Soba Noodles

406 calories, 66 gr carbs, 10 gr fat, 13 gr protein, 787 mg sodium, 11 gr sugar

  • 1 bundle soba noodles (about 75 grams)
  • 1 tablespoon natural peanut butter
  • 1 teaspoon grated ginger
  • 1 teaspoon soy sauce
  • 1 teaspoon rice vinegar
  • 1 teaspoon chili garlic sauce
  • 1/2 teaspoon honey
  • 1 teaspoon raw sesame seeds
  1. Boil soba noodles according to package instructions, drain
  2. Mix all remaining ingredients, reserving sesame seeds, until well blended
  3. Mix peanut sauce with warm noodles, top with sesame seeds
  4. Eat up!

Vegan Chocolate Caramel Truffles

Leave it to post-Easter to continue on the meat free and dairy free crusade. I was asked to do a coffee tasting for a work meeting and I cannot do a coffee tasting without epic treats. It’s just my MO.

While I made Chocolate Chip Caramel Cheesecake Bars for the rest of the crew, one of my fellow managers is vegan, so I wanted to prepare a treat that he could eat as well. The coffee we were tasting, Starbucks Caffe Verona, goes great with chocolate and caramelized sugar. Most caramel recipes contain dairy, so I went on a hunt to find a caramel flavoring that was vegan. I could have just purchased Starbucks caramel syrup, but I was not thinking when I was at the grocery store. Instead, I found this product, Walden Farms Caramel Syrup. It was fat free, sugar free, calorie free, gluten free, etc….and more importantly for my purpose, dairy-free and vegan.

I wasn’t sure what to do with my caramel sauce, all I knew is that I had to come up with something vegan which included chocolate and caramel.

Racking my brains for a little while, it hit me. Modify an Oreo truffle recipe. Oreo truffles were a huge hit with my staff back at Christmas time, and they are super easy to make – oreos mixed with cream cheese and dipped in chocolate. At my disposal, I had vegan dark chocolate for melting, Nabisco Famous Wafer Cookies (which are essentially oreo cookies without the filling), and the caramel syrup. I decided to mix the cookies, sauce, and some margarine to create my truffle filling. The margarine and caramel sauce became my cream cheese substitute. Caramel was used for flavor and the margarine was used as a creamy fat which would solidify at room temperature.

So…here’s my on the fly recipe:

  • 20 Nabisco Famous Wafer Cookies
  • 1/4 cup Walden Farms Caramel Syrup
  • 1/4 cup Margarine, melted
  • 4 ounces Vegan Dark Chocolate (more or less may be needed), for dipping
  • 1 tablespoon Vegetable Shortening, for dipping mixture
  1. In a food processor, process cookies, syrup, and margarine until mixture is smooth. Transfer truffle filling to a bowl and refrigerate for at least two hours, but preferably overnight.
  2. Remove the bowl from the refrigerator. Using a teaspoon or tablespoon (your preference depending on what size you’d like the truffles), scoop out filling and roll into balls and place on waxed paper. Place the balls back in the refrigerator while you work on the next step, or until you’re ready to dip.
  3. When you’re ready to dip, melt chocolate and shortening over a double boiler until smooth. The addition of the shortening is a short cut so you don’t have to spend the time tempering the chocolate. Remove from heat.
  4. Dip the cookie balls into the chocolate, roll around using two forks or two spoons. As each ball is coated, transfer to waxed paper. When all the balls have been dipped, you can move the truffles to the refrigerator to cool and harden.
  5. Truffles can be served immediately after the chocolate is hardened. To store, keep refrigerated in an air tight container.

Mold Baking Part 2 – Lamby Boy becomes a Cake

The Lamby Boy saga continued….

For the cake itself, I used this recipe from All Recipes. I chose this particular recipe because it called out going well with cream cheese frosting. Since that was the type of frosting I wanted to make for my cake, I was sold. I omitted the orange juice mainly because I do not like citrus flavored pound cakes. I added a little more vanilla extract for flavor. The cake was definitely dense and a little dry; I think it would make an amazing strawberry shortcake base if I was to use the recipe in another facet (in other words, not for cake decorating). That being said, it was still quite tasty.

More importantly, it held up! I made the cream cheese frosting using cream cheese, butter, powdered sugar, and vanilla extract. This time I did not need my food processor, I had a hand held mixer.

I chilled the frosting overnight, for no other reason than I wanted to decorate the next day from my mom’s house so I wouldn’t have to transport the decorated cake and risk ruining it. Since I am no longer employed as a professional caterer, I do not have the appropriate vehicle or materials necessary for transport the way I would when I would transport wedding cakes.

As for decorating itself…I took about a half cup of icing and dyed it with green food coloring for grass. I used a rubber spatula to spread a layer of green icing on my oval platter. This also worked as “glue” to keep the lamb from tipping over. I piped some extra green icing to give the illusion of textured grass. For the lamb, I spread one layer of white frosting to act as base – he needs a lot of frosting! I started out this first layer on a cutting board and then transferred him onto the “grass.” For the second layer, I piped the frosting row by row to give the illusion of a curly fleece. Some other recipes call for shredded coconut flakes. I love coconut but did not want that flavor and texture for this particular cake, so I stuck to hand decorating with the piping bag. I piped extra frosting on the top of his head and on his rear to make a tail. For his eyes, I cut a little bit of chocolate. His nose I used a tiny speck of frosting that I had dyed red. Finally, to complete the look, I put some spring colored M&Ms down on the plate to represent flowers, and I tied a colorful spring bow around his neck. Voila!

Sadly or not, no one cut into him on Easter. He was too pretty to mutilate.

Curried Carrot Ginger Soup

A friend of mine had a “Lean and Mean” Party last weekend. The intent of the party was for every guest to bring a healthy dish, complete with recipe and nutritional info. Work has been a bit hectic, so I didn’t really plan my dish or have much time to put it together. I went to an old stand-by that I did some sort of variation of back in my nutrition class in culinary school – carrot soup. It is essentially a low fat version of cream of carrot with a lot less cream and a lot more flavor, attributed from curry powder and ginger. And at 66 calories a cup, a guilt-free option.

Continue reading

Quick and Yummy Shrimp Dish

Continuing with my meat-free Lent, I’m cheating a bit with seafood – keeps me from eating just carbs.

I recently ate Shrimp Oreganata at Biggie’s Clam Bar in Carlstadt. Just tasting it I felt I could do something similar to replicate the herbed bread crumb topping, of course using my beloved Ritz Cracker Crumbs.

I thawed some medium sized shrimp that I had in my freezer, and removed the tails. I greased the bottom of a pie dish and arranged the shrimp in a layer kind of near each other.

In a small bowl I mixed cracker crumbs, lemon juice, garlic powder, oregano, pepper, cayenne pepper, Italian seasoning, some nutmeg, and a bit of oil to further wet the mixture. I pressed the crumbs over the shrimp and baked everything at 400 degrees until golden brown, about 12 minutes. My tummy was quite satisfied with the results.

This slideshow requires JavaScript.


Black Beans and Rice – Kind of a Fail

As Lent marches on, I’m cooking more vegetarian meals at home as well as being selective with what I order out. OK, I’m not so selective about ice cream or cheese, but it has been a challenge avoiding meat.

I really enjoy black beans as a side dish and from my culinary nutrition days I know a meal of rice and beans is considered a complete protein and a good meat substitute. So I attempted a simple Mexican style black bean recipe. It was tasty, but I’m not going to be competing with any restaurants soon.

One silver lining in my less than stellar attempt, I used my beloved pilaf recipe for the rice.

This slideshow requires JavaScript.

FOS – When Onions Become the Foundation of a Healthy Relationship

When I was in high school, I loved comedian Paul Reiser’s book, Couplehood. There was a chapter in the book that discussed going out for coffee. It was a pretty elaborate chapter and I wish I still had my copy of the book to accurately quote what he was talking about, which was essentially there isn’t anything beyond coffee that people could meet up for without it sounding odd or complicated. By going out for coffee, the name coincides with the event, you know what you will do when you get there. I want to show Mr. Reiser how this has evolved and you can in fact get together for more than a coffee date and less than a full meal – the answer lies in soup. French Onion Soup, specifically. Or, how I like to refer to it and hope it takes over the world, FOS.

This very food has formed the foundation of one of my friendships, the man whom I also commissioned for the graphics of this blog and one of my Starbucks partners, Mr. Eric Shine. We didn’t hit it off when we initially met and he was just a customer in my store, it was upon interviewing him and offering him a job that everything fell into place. Now Eric and I are in very different places in our lives, not just because of our 14+ year age difference. I am practically mid-career and focused on settling down and finding someone to share my life with. Eric’s life, in a way, is just beginning – he’s finishing up high school and starting college in the fall. Over time, we discovered we had quite a bit in common, such as our sharp wits, love of technology, entrepreneurial spirits, and a love of food. All of these commonalities were slowly discovered bowl after bowl of French Onion Soup…and we didn’t have to be hanging out to bond over the soup. It got to the point that we would just inform each other when one party was eating said soup somewhere, and the rest of the conversations follow. As Eric would say, when we met, onions cried…

Eric has an un-quenching thirst for the combination of savory broth, sweet caramelized onions, French bread, and gooey melted cheese. It is just one of those dishes that he endlessly craves. Up until about three months ago I had never even attempted to make it at home, it had never crossed my mind, but over time and knowing Eric, I was up to the culinary challenge.

Since my first attempt, I feel I have perfected my recipe, though I will continue to meet for FOS.

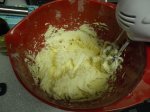
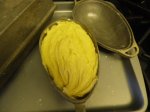
It all starts with an onion

Slice about 5 - 6 large onions to begin...

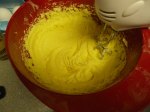
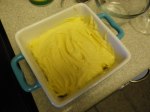
Melt about a stick of butter in a large stock pot, preferably one with a heavy bottom. Add the onions and cook over medium heat, stirring occasionally.

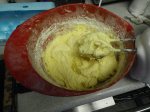
After about half an hour of stirring around the onions, they will start to brown and caramelize. Once they are brown, soft, and syrupy, you can add your seasonings.

For seasonings, I went with thyme, salt, pepper, bay leaves, and some parsley

Add about two quarts of beef stock, and allow to simmer for an least an hour. Soup can be served immediately, or cooled to be reheated and served later.

When you're ready to serve...in oven-safe soup bowls, ladle in some hot soup.

Add your French bread...I had rubbed a bit of garlic on the bread and toasted it first.

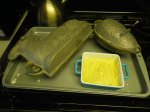
Add your cheese. Gruyere, Gouda, and Swiss all work well. Here I have Gouda. Place the bowl under your broiler. I have mine on a sheet pan to make it easier to place in and take out of the oven.

In 3 - 5 minutes, you have your own French bistro fare, worthy of the finest of friendships.